Showing posts with label BM. Show all posts

Wednesday, 9 May 2012

Back to Black (and blogging)

Well hello there!

Where have you been, I hear you ask.  I've been trying to find my blogging mojo, trying to study, trying to deal with some work/office issues as well as practicing my acrylic and gel applications. My practical assessments at college have started and my time internet time has been spent over at SalonGeek, getting tips on how to apply the perfect set of acrylics. Those of you who are nail or beauty technicians or have an interest in becoming one may find this site invaluable. By the way, those of you who are nail techs, why didn't you tell me how hard it is?? I had three practice clients who each had a manicure, massage, luxury treatment and a polish on Saturday and by 4pm I could have gone to sleep on the salon floor. I was that tired!

Even though I've been away, I've been taking pictures; but mainly of the enhancement work I've done so far. I can't post them here because they are too embarrassing, so I'll wait until next week, when I have to do some decent work for my assessments.

I'll show you what I'm wearing today:

 MUA's black shade and gold and white chains from Bundle Monster plate BM 12.

 I sat for about 20 minutes staring at these black nails, not knowing what to put on them.

I'm posing with one of my favourite oversized accessories at the moment. A 'gold' and black 'jewelled' bracelet. I think it's from H&M but I can't really remember.

Thanks for sticking with me during my absence. When I thought I might have lost a few readers, I seem to have gained some, so I'm really appreciative.

Take care folks ;)

xx

Monday, 5 March 2012

Leopard water decals and a little stamping too.

Hey friends.

I would love to tell you that today, I am wearing the below, but I'm not.  I did this over a week ago, and totally forgot about it until I found the pictures in my camera.

These are full cover water decals bought on Ebay.  You may notice that the index and ring fingers looks slightly darker - that's because I used two decals on those fingers due to tearing the first ones.

I can't express how much I love water decals that are big enough to cover your entire nail.  They don't take long to apply and because of their size,  I didn't need a base colour - only a base coat. To seal the decal onto the nail and add some shine, I used a top coat too. Simple, yet effective in my opinion.

I admit, I did get a little bored with the design so I tried stamping a design over it from BM plate 201 and wore it for another day.

Have you used water decals before? How did you find them? What about nail foils?

Sunday, 18 December 2011

Tutorial: Nail art stamping - lots of pictures!

Hey everyone, I hope you are well.

I've listened to what you've said and have made a pictorial to let you know how I create manicures with nail art stamping.  I'm sure other people have their own special techniques, but for those who are interested, here is how I do it.

I must apologise for the photographs; some were taken in natural light and others under the orange light of my kitchen. They aren't optimal conditions, but I did the best that I could....

First, start with your favourite base colour OVER A BASECOAT. Don't scrimp on the basecoat if you don't want stained nails. This is 'Purple Diamond'.

Sponge on your second colour. Put some polish on your sponge and dab it off onto a paper towel, then dab your nails, starting on the very tip first and then working towards the middle of the nail.

Sally Hansen's 'Red Carpet'.

Add a layer of glitter! This is 'Pinky Glitter' and these three gorgeous polishes were given to me by Marisa at Polish Obsession in a swap we arranged recently.
Use a layer or two of top coat over the glitter to smooth out the surface after the glitter. Doing this helps your stamping pattern to look like it's 'floating' on your nail. That's the preparation done.

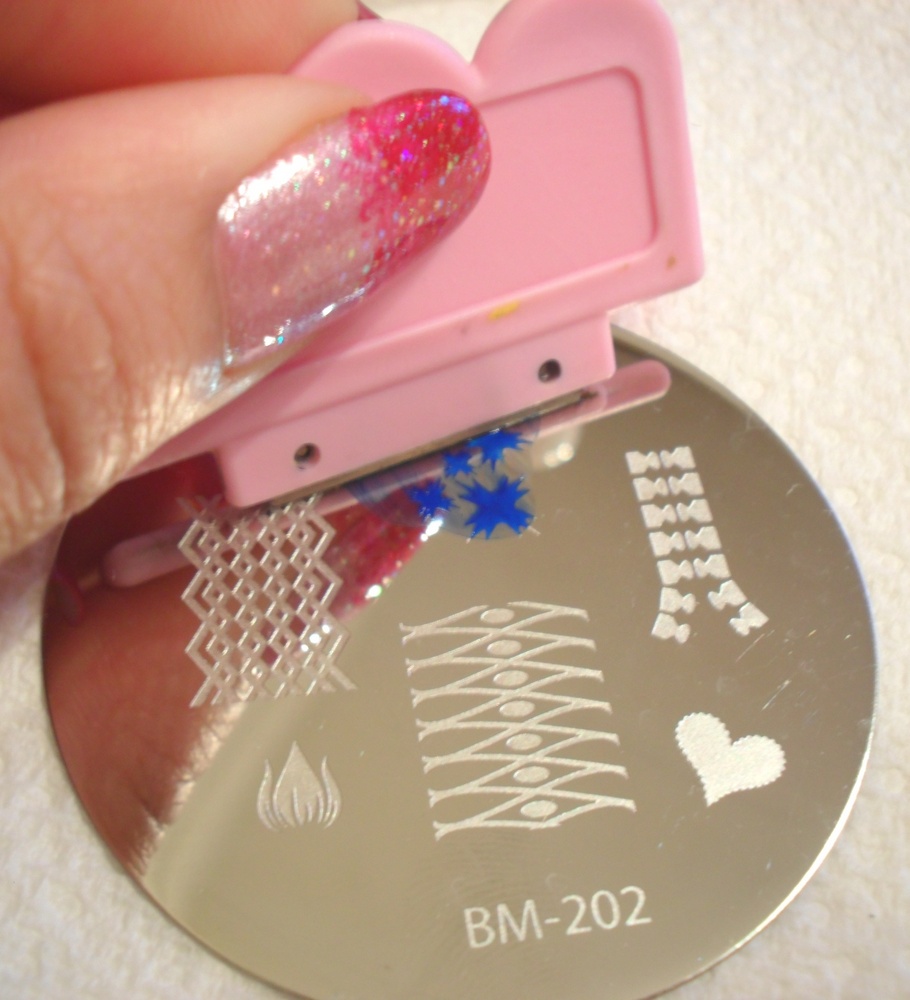
Materials to use are a stamping polish or a highly pigmented regular nail polish, stamper, scraping knife and image template. You can get a starter kit from various places. I got my first a year ago here. Bundle Monster does fantastic plates for a fraction of the price Konad charges.

 Cover your chosen image with polish.

 Scrape away the excess polish.

Immediately roll the stamp onto the image...

 When you remove the stamp, the image should be transferred onto the rubber.

 Blue didn't go with the polish I was wearing so I tried again with a white 'special' polish from Konad. This polish IS good, but sometimes you can get a normal polish that is cheaper but just as effective. MUA does brilliant black polish which only costs £1.

Position the image and slowly roll it onto the nail with a little pressure. Roll it all the way over to ensure that the image is transferred. It should transfer nicely but if it doesn't, lightly swipe the image off your nail with a cotton bud dipped in nail polish remover. If you covered your main polish with a top coat, you shouldn't have any issues with smudging.

Cover your nail with a clear top coat. Put a big drop of polish on your nail and try not to let the brush touch the nail when doing so. Don't worry if you flood your cuticles with polish at this point - you can remove it later.

 Finished product!

I tried my very best to make this as concise as possible... 

This is what works for me - what do YOU do?

Thanks for reading folks, I'm off to bed :)

xx


Tuesday, 6 December 2011

Nude glitter stamping... and what I'm listening to right now.

Hello friends, how are you tonight? 

I'm sat here listening to British recording artist called Daley and editing my pictures. Doesn't sound like much? Well, simple things please me. Like turning the television off and putting some music on the iPhone. Or listening to a CD. Yeah, a real CD. Or even finding an old cassette tape (hands up if you still have one of THOSE!)  Anyway, I'm going to pop the YouTube video of this guy at the bottom of my post so you can enjoy the evening with me.

Right, nail time!

 Here is The Face Shop's Number BR802 with Peripera's P040 (glitter) and leaves from plate BM208. I did this last night.

Don't you hate it when you do your best to stamp a nice, clear image...only for your cruddy top coat brush to drag and streak it?

I have a few tips for you when you are stamping (if you don't already do these things).
1. To minimise streaking, put a put a dollop of polish on the brush and float it down over your nail. DON'T LET THE BRUSH TOUCH YOUR NAIL.

2. To make it easy to remove a messy image without ruining your base polish, make sure you use a top coat on your base colour BEFORE stamping over it.

3. Have a cotton bud and cotton wipe readily soaked in acetone or polish remover to clean your stamper or remove part of an image you don't want, before putting it on the nail.  You can also use a small brush dipped in solution to do this.

These tips are in hindsight...had I thought about it before, the manicure would have been tidier.

You could also change this design by turning it into a french manicure. Start with clear base nail bed, and use the colour, glitter and stamping on the tips. For effect, you cour outline the 'smile line' with some...

...metal balls (if you want too see this old manicure, click here)

By the way, one of you lovely ladies made me think today. 
Do you want to see more tutorials (step-by-step pictures) when I do stamping, or are you happy for me to just tell you what I did? A lot of you ladies are pretty proficient in your stamping already, but what about you readers who don't have blogs or are new to nail art stamping?

Have a listen to Daley and let me know in the comments box.

xx

Tuesday, 29 November 2011

31 Day Manicure Challenge Day 29 - 'Nails inspired by the supernatural'

Oooh, helloooo.

How's it going everyone?

Tonight I'm feeling a lot better and have a bit of energy for a change!  The challenge for today was to create a manicure inspired by the supernatural. I decided to hunt down my matte top coat specifically because I haven't used it for so long.

This is a random polish my husband picked up for me at our local pharmacy. He told me that he and the kiddie were deliberating for ages as to which colours to get for me :)

The red was layered with a pink hexagonal glitter (by Peripera), then layered with Nfu-Oh 50, stamped with Models Own 'Gold Digger' (using BM 223), then mattified with Rimmel Pro Matte Finish. It's not awful...could be worse!

Boo!

xx


Monday, 28 November 2011

31 Day Manicure Challenge Day 28 - 'Nails inspired by a flag'

Hi friends (old and new).

I'm afraid I'm not going to be posting an original manicure tonight. Okay, so it's my very own creation, but it's one I did a while ago. I simply don't have the energy to do what I would have liked to...I'm not feeling too well.

This is something I did to mark the wedding of Prince William and Kate Middleton.


Have a look here for further details.

I'm off!

xx

Saturday, 26 November 2011

31 Day Manicure Challenge Day 26 - 'Nails inspired by a pattern'

Good evening ladies (and gents).  Tonight's manicure is based on a pattern that can be found on a Folli Follie bracelet.

This is a Beauty UK mini - it doesn't have a name or number.
Here is my inspiration.  It's £73...but whilst the main body is resin, the motif is rose gold plated. I wouldn't turn it down if it was bought for me, but I'd rather by polish!


The plate used was BM03.

Meh.

A quick reminder for you. If you haven't entered my giveaway, you have four days left!!

xx

Thursday, 17 November 2011

31 Day Manicure Challenge Day 17 - 'Glitter'

It's Thursday!

Today is glitter day and I have some abismal photos to show you. It was so dark this morning that I couldn't take any pictures before I left for work. I chucked a bottle of polish and my camera into my handbag and decided to take the pictures on my lunch break.

Oh dear.  I was sculking around the back door, squinting, changing light settings and posing the polish bottle so as not to cover the label with my fingernails, whilst at the same time I was trying to act natural just in case someone caught me acting like a weirdo. With all the jumping and rushing, every photo I took was pants...apart from two.


 I started with Models Own Pro in 'Midnight Blue'  bought in Boots at Brent Cross. The picture does the colour no justice and I will get around to swatching it properly at some point. I then layered a gradient of OPI's 'Absolutely Alice' and Sinful Colors 'Frenzy'. When I had finished, it was so bright, I would have caused a distraction in a very, very serious meeting I had at work, so I tried to dampen the bling (oh, how I hate that word) with some stamping.


I used a blue Konad special polish and BM plate 201.

I'm not so fond of this one, but I was rushing and didn't have time to do it the way I would have liked.

xx


Sunday, 13 November 2011

31 Day Manicure Challenge Day 13 - 'Animal print'


Hi all!

Today was animal print day.

I'm deliberately not looking what other lacqueristas have done before me because I'm really trying to remain original. It's hard though, especially when it's the end of the day and I'm sitting here staring at bare nails with not a single idea coming to mind.

Okay, enough of the crying! Here is my animal print...be easy on me because I was tired.
Color (do you know how hard it was for me not to type COLOUR?!) Club 'De-Luxe-Cious

Bundle Monster plate BM-221

Hmm. Lazy stamping here.

Tomorrow the theme is flowers. Gahhhhhhh!!!!!


Sunday, 30 October 2011

Peripera Pussy Cat

Don't you just LOVE that pussycat? I got her and a load of other goodies from the lovely Anastacia recently in a swap. If you don't already know her, you might want to visit her - she's a doll.

This polish thinks she's so posh, she doesn't even have a name or number. When it dries, it has an interesting smell. Sort of fruity methinks. Don't quote me though; I've had a cold for about a month and can barely taste or smell a thing. One of my friends told me that I should start charging this cold rent because it's been with me that long.

The plate used was BM024 - from the newer release of plates.

You know I'll try to help you save money where you can, right? Well, MUA are the best for a black stamping polish. No lift, no drag, quick drying...all for £1.

My work colleague said that this mani looked like an Easter egg. Is she right?

xx

Friday, 1 July 2011

Sinful...Dream On

Hey friends.

Hope you've all been well. 

I've had a lot of things going on separate projects going on for me over the past few weeks (looking for nail technician courses, business ideas, trying to get the right hair colour...I'm now a red-head) so whilst I haven't been posting, I have been doing 'nail stuff'.

My nails are getting longer and are actually longer on my right than they are on my left hand. But because I've been neglecting them a little, they are dehydrated and have started to curve inwards at the corners.  To help alleviate that problem, I've rounded them slightly.  And now I don't like them.  Never satisfied, me.

Here's what I did last night and have intentions of wearing into next week.


Here is the polish in order of use:
L-R: Sinful Colors 'Dream On', Gabrini '365', MUA Shade 2 and GOSH 'Holographic'.


A close-up of Gabrini's beautiful holographic glitter:

The plate I used from the most recent Bundle Monster set:
I hope you like it.  I'm off to have a look at my dashboard because I know I've missed out on some good blog posts recently. 

xx

Tuesday, 14 June 2011

East Asian inspired mani!

Hey friends (big wave to my new subscribers x)

Sooo... this is what I'm wearing today. I thought I'd better make up for my lack of posts by doing something a little intricate.


The polish, in order of use:
 Color Club 'Resort to Red', Essence Nail Art Twins 'Carrie', MUA Shade 2, Models Own (yeah, I know it's a mess!) 'Gold Digger', Seche Vite Dry Fast Top Coat.

 I stamped on the fans first and then the above image (I don't know what it's called - if you do, please let me know)
I'm actually going to wear this until it starts to chip on me.

I hope you like it!

xx