Wednesday 29 February 2012

NPW - 'Crack the Whip'

Hi all, how goes it tonight?

Some weeks back, I picked up this pretty red with another pink from Missy C's lovely online boutique Usually, I'm not good with a bright red, because I think it makes my hands look gigantic. Unfortunately, the big hands are hereditary (never mind), so I'm just going to have to accept it.

This is three coats of 'Crack the Whip' - a vibrant red with a jelly finish. Application was a breeze and the formula was very smooth. The brush is wide, flat and has a rounded tip, so it's quite easy to paint tidily near the cuticle without too much mess. I did have a visible nail line after three coats, but this could easily be remedied by using a cream red first. I like it like this though.


What do you think? Do YOU do red?

P.S. If you're looking for red nail polish, try looking at Buy.com with these coupons!

xx

Sunday 26 February 2012

Nail Tech Diary - Week 1 and NOTD

Friends, as you will already know, I started my VTCT Level 2 in Nail Technology (nail extensions) on yesterday.

First, let me start by saying that I am a moaner. I believe in good customer service and it upsets me terribly when I'm told to expect something and it doesn't come to fruition. I paid for my course at the beginning of February (two courses actually - the introduction and then the tech) and got my receipt and enrolment card. Great. I've been attending the first course without issue...but had noted that I hadn't received further information about the tech course. I called the college several times to see if I could glean some information from someone, so that I didn't have to start shouting at reception. I would do that you see...I have an awful temper *blush*.  I was told that I would receive something in the post. Erm, I didn't.

I went along to college anyway, just feeling that there would be some sort of an issue.  As I sat with a few of the girls I knew from the other course and the lecturer came out and started calling names on her register. Guess who she didn't call? That's right, me. It was suggested that there might have been an 'admin problem' or that there'd been some issue with my enrolment, but as there were two other ladies who didn't seem to be there at that moment, I'd be allowed to tag along. Okay, I don't DO tagging along, especially when I have spent a lot of money to get onto this course. I decided not to have a shout first thing in the morning, because this issue would have had nothing to do with the lecturer herself. The security guy was also about 3 feet taller than me too and I wasn't about to get booted off campus.

The first part of the day was spent on admin. Filling in forms and promising not to go drinking barbacide or flicking paraffin wax at one another - riveting stuff. I also got my ego stroked a few times too; some of the younger girls in their 20's thought I was the same age as them. Hmm, must have been my dewy make-up.

After lunch, we were shown how to prepare a natural nail bed for the application of a false nail tip and then got to apply some. You have absolutely no idea how frustrating such a simple task could be! We can't order our own supplies until week four, so we were stuck with fighting to find tips (from the college supplies) that fit, to find glue that hasn't dried out, files and all the other things that we really should have had access to. I don't know if I was put off by people staring at me when I was working, but I had to fight to get the nails to stay stuck! Every time I went in to clip off the extra lengths, the nails would ping off in all directions. Admittedly, it didn't help that the only tips left for use were either far too big or way too small. I also used a little too much glue at times. Once the tip was in place, we had to use an emery board to 'blend' the seam between the nail bed and the end of the false nail tip. This was also pretty difficult because we were trying to make the join look seamless, without filing the nail bed to death. The key to this was small, light strokes at the joining point.

Friends, I'm not complaining. I had a great day today and got to speak to some nice people. My lecturer was actually trained by Lena White of OPI 22 years ago...so I MUST be in good hands, right?

Would you like to see what I wore to class?  They said 'bare' nails, and I took that to mean 'less garish than usual'...


This is Sinful Color's 'Pinky Glitter', with spider webs from BM plate 13 and two coats of matte top coat.
I realise that this was probably not appropriate, but hey.

The day before this, I was wearing this little man, sent to me by MariJo

My green Snowman! I love him...and he didn't stain either.

I'll come back with pictures of my practical work at some point...is that something you'd like?
Is there anything else you might want to see here (techniques, art, theoretical information about nail care, more shouty posts) Let me know!

xx

Saturday 25 February 2012

My bare nails

After filing my nails to nothing for the sake of my manicure and pedicure course a few weeks back, I'm pleased to see that they've grown out a little.


I cracked the ring fingernail somehow. It's still attached and doesn't bend...I don't know what is going on there!

This is the cuticle oil I've been using recently. It's almond oil and I absolutely love the smell of it. I use it any time I remember. Don't be fooled by the name 'Maximum Growth'; I do not believe that this grows your nails per see, but it complements healthy nail practises such as moisturising.

I start the nail technology course this weekend, so goodness only knows what my nails will be looking like in the next few weeks!


xx
 

Thursday 23 February 2012

Plaid and boring nail art

Today's manicure came about when I was trying to cheer myself up. I was rummaging (as you do) through my Helmer and came across China Glaze's Black Diamond.

After putting on a couple of coats, I decided to add some white and grey stripes of acrylic paint:

I also added a few lines of glitter to jazz it up a little.


 It's not terrible, but it's not exactly exciting is it? I guess it reflects the strange mood I've been in recently. I'm not still not my usual self for various reasons. Perhaps if I wear more pink, it might cheer me up a little...

So, was it boring enough for you?

xx

Wednesday 22 February 2012

NYX swatches - part two

I'm back with a few more NYX Advanced Salon Formula polishes (click here for the first half of the swatches).

L-R: Gold Glitter, Precious Gems, Moonwalk, Maroon and Sepia

Two coats of Precious Gems. This is a thick pink base with mini holographic glitter particles and hexagonal shapes.
Two coats of Maroon - this is one of my favourites. Have a close look at that colour. Can you see the tiny gold and purple particles?

 Three coats of Sepia, a pretty blue jelly finish polish. This is actually what the polish looks like, I only realised how grotty the bottle was when I was editing tonight.

The camera had some difficulty picking up the true colour.

One layer of Moonwalk over the Sepia. Moonwalk is a black jelly base with holographic glitters. It was so thick that I only used one coat.

This is my favourite glitter. It's not even glitter, it's gold flakes in a clear jelly base. There was no issue with the consistency on this one - I used two coats.

I hope you liked this post!

xx

Monday 20 February 2012

Okay...I'm about to tell you about my Glossy Box.

Today, I'm blogging out of my comfort zone for three reasons:

1. I'm using the PC (I usually use my little netbook)
2. I took photographs with my iPhone because I have this random black blur coming up in the lens of my camera. I couldn't figure out how to upload the pictures to my computer (I never do it!), so I had to email them from one account to another!!
3. I'm blogging about my Glossy Box and not nail art! Some of you may be bored by this post, but there is more to me than nails and you'll get to see a few pictures of me...sort of.

Those of you who do not live in the UK may not know about the Glossy Box - if you do, please feel free to skip to the pictures and reviews of the products I received. If this is a new concept for you, read on...

Glossy Box is a monthly subscription which sees you receiving a delivery of five surprise, 'luxury' beauty items through the post. I say surprise because the items change each month and there is no guarantee that you will get the same as another subscriber - contents will vary. These items can be make-up, creams, nail polish and generally anything that will allow you to feel a little pampered. You pay £10 a month but can cancel the subscription at any time, with the click of a button. Shipping in the UK is £2.95.

This box is now my second. I got one last month and it was 'okay'. I had seen a lot of people saying how pleased they had been with their boxes and there were lots of people complaining too. I was late in subscribing, so I was in a bit of a panic, prior to getting my first box - luckily, I got things that I will actually used.

On to the contents:


DuWop 'Venom gloss' (5ml sample size) and BM Beauty 'Pure Mineral Eyeshadow', (1g sample size).

The disclaimer on the little info sheet in the box says 'Please note the Lip Venom may cause a light tingling sensation upon application'. LIGHT TINGLING?!?!!? I think not!

 I put this baby on and thought it looked pretty cute. Then the fire and brimstone sensation kicked in. I think this is supposed to be one of those plumping glosses that makes your lips swell so you can have a pretty pout. My lips are full enough thanks, and even if they weren't, that BURNING sensation is not something I'd be willing to put up with. £16 for a full sized tube (10.4ml)? Not worth the money in my opinion. The colour WAS nice though.

I haven't worn this eyeshadow yet, but it looks like a nice enough colour. It was quite light to swatch and brushed off easily. I'm not sure if this is a good thing when it comes to an eyeshadow. £7 for a 2g pot...

Paul Mitchell 'Round Trip' - a liquid curl definer (25ml sample size):
Now this one was pretty exciting for me. I have very curly Afro hair and I usually use a gel to define my curls.

Here are a few of my squashed curlies after a night of wild sleeping with children climbing all over me.

Here it is wet and after applying the curl definer.

Stretched out: My hair has the capacity to shrink up to half of its length when allowed to dry in its curly state.

End result...well, the picture turned into hieroglyphics with all of the sending back and forth via email :(
I actually liked this product. I went on like a serum but bubbled a little. I went on slick, wasn't greasy and had a light, fresh fragrance. When my hair dried, it didn't have too much of a hard, crunchy feel like gel usually does. It didn't give my curls any 'hang', but that's alright. I would buy this for the full price of £12.95 (200ml bottle).

Dr Bonner Magic Liquid Soap (Full size bottle 59ml costing £1.99):
Not what I would consider a luxury item at all. It was strange. It pours like a thin liquid but lathers into suds in your hands. When washed off, it feels like you've used a bar of soap to shower with. That strange dried out feeling...not really my thing.

Como Shambhala 'Invigorate Body Lotion' (50ml sample bottle):
I love this! It's a light moisturiser which has essential oils eucalyptus, geranium, lavender and peppermint. You wouldn't want to put this on your face or on any sensitive skin, because it might tingle. Keep well away from those nether regions...

After some consideration, I am in two minds about my Glossy Box this month. It was okay, but I wasn't wowed by the contents. I'm going to wait for another month and if the next box I receive is rubbish, I'll just cancel the subscription. There was a little note in the box suggesting that I should expect the unexpected after 24th February...I'll let you know if something exciting happens!

Don't worry, I'll be back to regular programming tomorrow.
xx


Friday 17 February 2012

UPDATE on my Mavala 'Double-Lash' eyelash growth experiment

This was not one of my more popular posts, but I wanted to give you an update on the Mavala Double-Lash eyelash solution that I showcased here in January.  I'd originally thought about updating every week to show my progress, but after the first week, that idea was completely laughable - there was no change!

I bought this for about £10 in Boots.

Start date 13th January, with product.

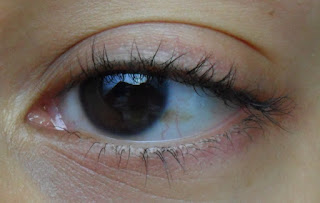
Today, with product. Ermmmm, I don't really see a positive difference on the lower lash line. The upper lash looks a little thicker in some places, but I don't know if that's because my big ol' eyeball is a little to the left.

13th January with mascara OVER the product. The right side of the lower lash line was where I was looking for progress.

Today with product and mascara. Well, my upper lashes are not doing anything amazing right now, but that lower lash line DOES seem to have a bit of improvement after all.

To be clear, I've used this product once a day, mostly in the morning. The directions suggest night-time use, but after removing make-up at night and then putting on the product, I sometimes experienced a stinging sensation on my lash line. I think this is because I'm pretty rough when I remove my mascara (I use tea tree oil face wash and then go back again and use a vitamin e oil cream remover).  I didn't want to risk causing unnecessary problems with my delicate eye area, so after washing my face in the morning, I'd apply the product and when it was dry, I'd add mascara - no sting. I had no other negative side effects either and I wear glasses AND contact lenses.

I wouldn't suggest wearing this product on its own - it leaves a white residue. You wouldn't want people to think you were walking around with crusty eyes.

Would I buy it again? Well, for that tiny improvement, I think £10 was a bit steep. There are other eyelash growth products available, which cost far more...but I'd rather buy nail polish! I'll use the bottle until it's empty, so if there is any further progress, I'll let you know.

Thanks for reading folks!

xx

Thursday 16 February 2012

Hand-painted lace effect manicure.

Today I have a tutorial for you. 

I was thinking of creating a black lace manicure, but couldn't find any lace that I really liked. That's when I decided to try free handing a lace pattern onto my nails. 


Things you will need:
You will need a base polish. For the life of me, I have no idea what this Barry M polish is called. It's an old one and it is less than half full now. The glitter is number 70 by Catherine Arley. The acrylic paint is non-specific and I actually changed the brush for a thinner one because the lines were just too thick.

 Two coats of base colour and one coat of glitter.

 Create some waves with the black paint.

 Make diagonal lines but don't panic if your lines aren't straight. You can use the wonky lines to prove to people that yes, you did the design YOURSELF!

Add some dots for detail. I actually used a tooth pick because the dotting tools I have are far too big.

Add more detail with the paint brush and when the acrylic is dry, use a top coat.

L-R: '276' with no name and '308-Berry Ice Cream'
I told you that this bottle of polish was old. Look at the worn print - the font size has even changed on the newer bottle.

I hope you enjoyed this tutorial.

Have you ever worn a 'lace' manicure? What have you used to recreate the 'lace' effect? Would you like to see more of these types of designs in future?


xx

Tuesday 14 February 2012

NYX Advanced Salon Formula - part one of swatches

Helloooo!

I've recently managed to get my hands on some NYX Advanced Salon Formula colours and thought I'd swatch them for you...


L-R: Lime, Acid Pink, Ocean Blue, Be Jeweled and Forever Young.

 Lime. Eye-watering bright green. Smooth consistency, full of shimmer. Two coats applied with a base coat.

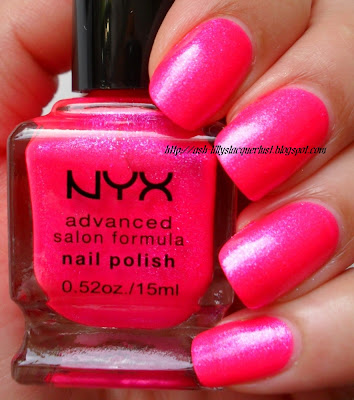
Acid Pink - Brilliant pink with silver shimmer particles. Thicker consistency, but I got great coverage with only two coats.

Ocean Blue, a light blue with shimmer particles. Thinner consistency than the pink but once again, maximum effect only two coats.

Be Jeweled. A turquoise polish with gold and blue particles. Two coats. This one reminded me of a mermaid and was a nightmare to capture on the camera. I have now realised that I have quite a few colours similar to this - none of which I wear. I may put this one in a giveaway if no-one objects to winning a swatched polish.

Forever Young. A rose coloured base polish with silver micro glitter and flakes. This one was much thinner than the others. I used three coats to get coverage.

I have a few more to swatch but the natural light wasn't playing ball when I did these.

Which of these is your favourite? Do you have any NYX polishes yourself? Is the idea of a 'once-swatched' polish in a giveaway a deal breaker or would you be happy to own one?

xx