Hey everyone, I hope you are well.
I've listened to what you've said and have made a pictorial to let you know how I create manicures with nail art stamping. I'm sure other people have their own special techniques, but for those who are interested, here is how I do it.
I must apologise for the photographs; some were taken in natural light and others under the orange light of my kitchen. They aren't optimal conditions, but I did the best that I could....
First, start with your favourite base colour OVER A BASECOAT. Don't scrimp on the basecoat if you don't want
stained nails. This is 'Purple Diamond'.
Sponge on your second colour. Put some polish on your sponge and dab it off onto a paper towel, then dab your nails, starting on the very tip first and then working towards the middle of the nail.
Sally Hansen's 'Red Carpet'.
Add a layer of glitter! This is 'Pinky Glitter' and these three gorgeous polishes were given to me by Marisa at
Polish Obsession in a swap we arranged recently.
Use a layer or two of top coat over the glitter to smooth out the surface after the glitter. Doing this helps your stamping pattern to look like it's 'floating' on your nail. That's the preparation done.
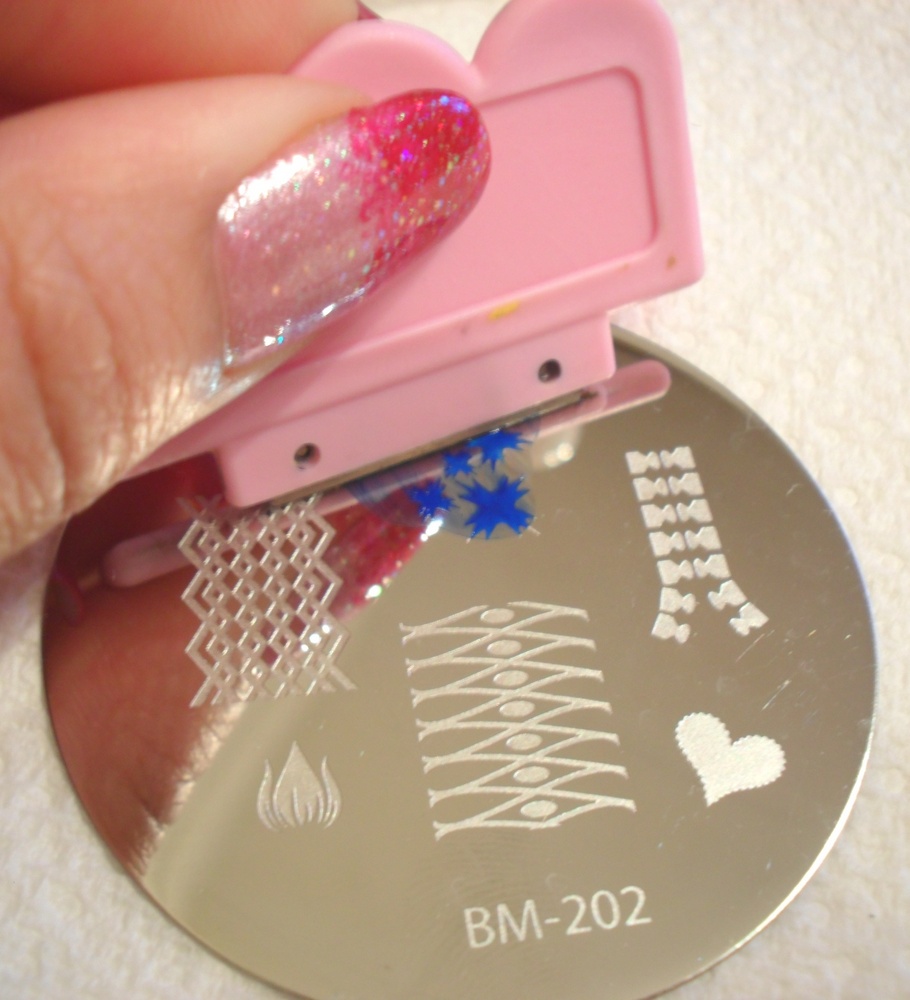
Materials to use are a stamping polish or a highly pigmented regular nail polish, stamper, scraping knife and image template. You can get a starter kit from various places. I got my first a year ago
here.
Bundle Monster does fantastic plates for a fraction of the price Konad charges.
Cover your chosen image with polish.
Scrape away the excess polish.
Immediately roll the stamp onto the image...
When you remove the stamp, the image should be transferred onto the rubber.
Blue didn't go with the polish I was wearing so I tried again with a white 'special' polish from Konad. This polish IS good, but sometimes you can get a normal polish that is cheaper but just as effective. MUA does brilliant black polish which only costs £1.
Position the image and slowly roll it onto the nail with a little pressure. Roll it all the way over to ensure that the image is transferred. It should transfer nicely but if it doesn't, lightly swipe the image off your nail with a cotton bud dipped in nail polish remover. If you covered your main polish with a top coat, you shouldn't have any issues with smudging.
Cover your nail with a clear top coat. Put a big drop of polish on your nail and try not to let the brush touch the nail when doing so. Don't worry if you flood your cuticles with polish at this point - you can remove it later.
Finished product!
I tried my very best to make this as concise as possible...
This is what works for me - what do YOU do?
Thanks for reading folks, I'm off to bed :)
xx
 The plates used were B06 and B10 from KKCenterHk
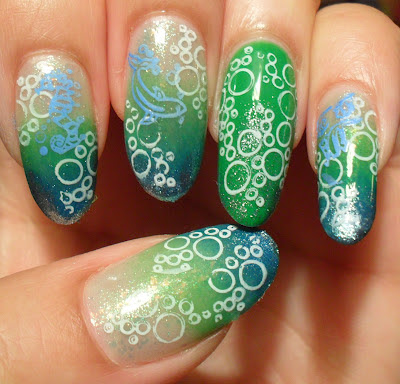 I'd had intentions of painting the fish in their respective colours, but at that point I was lacking the will and the patience. The white stamping polish didn't want to work with me, hence the reason why some of the bubbles look more like semi-circles! The images on the plates were crisp and clean, so yes, I do think I need to replace my polish.