Saturday 30 July 2011

Fimo Fingers

Hi friends.

Over the last few months, I've built up a lot of nail art supplies and they are just stuffed into my helmer. It certainly feels as if I have more rhinestones, wraps and glitters than I do nail polish! I will be adding nail art supplies to my shop at some point so don't forget to have a look.

Yesterday I got my fimo's out...

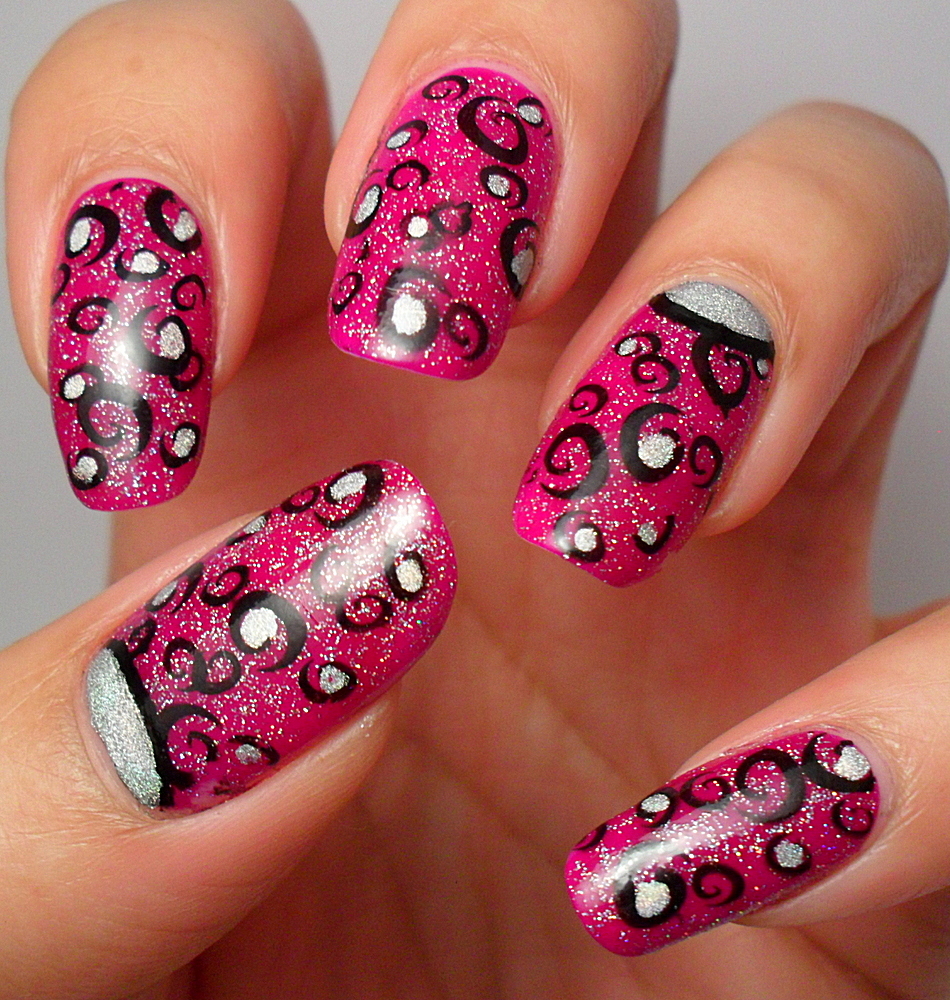
I didn't take pictures of all the polish, but here is what I'm wearing at the moment.

What I did:
Painted my nails with Sally Hansen's 'Hard as Wraps'
Painted the tips with Barry M's 'Berry Ice Cream'
Painted on one layer of Nfu-Oh 50
Adhered the fimo slices with nail glue
Added dots of acrylic paint
Topped with Sally again and a layer of Seche Vite

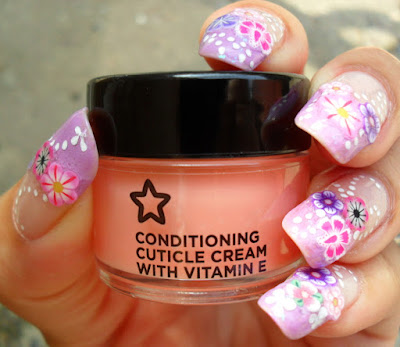
I totally love this balm right now. I got it from Superdrug (yes, I know, I'm always in there). I put it on at night and in the morning my cuticles thank me for it; my purse did too, I think it's £2-3.

Okay, no more pictures!

Take care!

xx


Friday 22 July 2011

Crocodile and Cranberry

Hey friends, happy Friday!!

I've got a story for you, so if you aren't in the reading mood just scroll to the pics!

It was the baby's first birthday today and a few of the nearest and dearest came over this evening. Although I'm so happy to reach this milestone, it also makes me feel a bit ancient. On the other hand, I suppose I shouldn't really complain.  I was in Tesco's yesterday, buying plastic cutlery for when family/friends come over to celebrate the baby's birthday on Sunday. The self-serve checkout made a funny noise and I had to call for assistance.  When he came over, the assistant told me that the till had gone berserk because I had bought more than two packs of cutlery. I said, 'but they're plastic!'. He laughed and said 'I know, it's stupid, but that's how it goes'. We shared a chuckle, but then the chuckle started to wane and then there was silence. He was still standing by my till looking at me expectantly, so I asked what he wanted from me...so that I could get back to work....with my plastic forks He told me that I needed to show him ID to prove I was over the age of 25. Hmmm. I didn't know whether to laugh at him or start shouting. I said that I didn't have ID, but I needed my spoons. He shook his head at me. I told him that I was 30-ehem and then he looked at me in shock, swiped his card thingy and sent me on my way, forks an' all.
 
Now to the manicure!!
I know that shatter/crackle effect polish has been everywhere over the last few months and I have a feeling that this will continue, due more and more cosmetics companies jumping on the bandwagon.. Fortunately, there are so many different ways that this polish can be used and I'm happy to see that people are experimenting with it.

Here is my offering.

I started off with this: Rimmel's Cranberry Zest. Wow. This polish smells so sweet I started to get a headache after putting on the first coat.
I then added a coat of Zoya Astra - an indulgent red glitter. When this was dry, I put a thin strip of scotch tape in the middle of the nail and painted Barry M's Nail Effects in Black over it. When that was dry, I removed the strip and and added some nail stickers.

I tried to use the crackle as a frame.

 Upon closer inspection you may notice the polish around the cuticle area. Generally, I have a very steady hand. I RARELY need to go back to a manicure to clean the edges with acetone and a flat brush. Today was no exception. The cranberry colour was about a millimetre away from my nail edges and cuticles, it was neat and there was no colour bleed.  That was until the Seche Vite.

I love Seche Vite as a top coat because, although it retails at about £10 in Boots, it dries your polish so quickly and leaves a beautiful gloss, so if you are a late night painter, you won't wake up with the imprint of your sheets on your nails in the morning. What I DON'T like is the shrinkage. Yep, I slathered on the Seche and it made the polish shrink in on itself.

And look at the tips of the nail after a few hours of wear - it looks like it's three days in! I was so annoyed because the manicure looked like a mess as a result of this shrinkage. I refused to do a clean-up because it would end up looking like the manicure had been growing out for two weeks. As I knew that this would be coming off over the weekend, I thought I'd play with it a little.

I have some 3D flowers and acrylic bows to put in my shop but thought I'd sample them first. They feel like rubber and were adhered with a bit of clear nail varnish and layered with the same - NOT the Seche though! The flowers are lovely and are ideal if you want to recreate a Kawaii manicure (I LOVE these but I'd  have to tone them down for conferences at work!) Unfortunately, I didn't pick the flowers that actually complemented the original manicure!! I was even more annoyed with myself that I peeled these off whilst trying to stay motivated in my team meeting on Thursday!

I'm not sure how to combat the shrinkage yet, but once I know, I'll let you know. If YOU know, let ME know!
Okay, enough twaddle. Goodnight friends!

xx

Wednesday 20 July 2011

Midnight Mission Remixed

Hey friends, hope all is well.

Remember I was thinking of doing something else to my last manicure? Well I did. I used the glitter polish, some nail stickers and some black acrylic paint to make the swirls.  I hope you like it :-)


xx

Sunday 17 July 2011

Midnight Mission and my new shop!

Hi friends, how are you?

I've been busy with my new Shop page...take a look!

As a result I'm having a lazy day today (wooo!) and I guess it's reflected in my current manicure.  Admittedly, I've been wearing this for about three days, hence the tip wear, but I do have intentions of jazzing it up. Honestly. Not like the last one.


This is China Glaze's Midnight Mission and this is the second time I've worn it since this old post.

I'm seeing this with some silver design work. Maybe free-hand, maybe stamping - I'm not sure yet. I'll figure it out after I get back from the cinema later. Yes, that's right, I'm going out!

xx

Tuesday 12 July 2011

Pink tips!

Hey, hey!

So you know I couldn't go without colour for long.

This is Gabrini, shade 320. I painted this holo glitter onto my nails, starting lightly in the middle of my nail building up the depth of the colour towards the tip of my nails. I couldn't be bothered with sponging so I tried this instead.


 I flooded my cuticles with Seche Vite *slaps hands*

Pretty huh? It needs a pattern though, don't you think?
More than likely I'll be back again having adulterated this manicure. For shame.

Laters.

xx

Monday 11 July 2011

Naked nails

Hi friends. How's it going?

I thought I'd give you an update on my naked natural nails. I'm happy to say that the stains that were on the nail bed on my left ring finger are now grown out. I still have the stain on the free edge but that can be covered up with a french manicure...haven't done one of those for months!

With a base coat of Sally Hansen's 'Hard as Wraps' - there's a photo in this post. This is stuff is great because although it's a polish, it's thick and it acts like layer of gel. By far my favourite basecoat.

 Posing doesn't come naturally to my right hand.

So before these nails start to break I need to get cracking with a french manicure at some point.

Take care folks!

xx

Wednesday 6 July 2011

I'm NUDE!! Yes, ME!

Hello friends (and a big hello to my new subscribers, thank you for reading)

Those of you who read my posts will know that I love glitter, sparkle and block colours. Today I'm nude. Yep, typing in the nude...with only a few stickers to cover my modesty.

LOOK...

I generally tend not to go for beige or nude colours because I like a bit of impact. This is Nails Inc's 'Balmoral' one of four in a limited edition set called 'The Royal Collection'. I believe this was released in honour of the wedding of Prince William and the former Kate Middleton; my husband bought it for my birthday in May. The colour is accurate in the above picture.

L-R: Sandringham, Balmoral, Westminster Abbey and Windsor.

What I did was:
1. Paint my nails with the base colour
2. Used a layer of random gold glitter
3. Sponged on the Westminster Abbey on different parts of the nail
4. Put a few stripes on with a random gold polish
5. Stuck some 3D nail stickers on and slathered on some Seche Vite. Simples.


Please don't mind the dry hands, I've been washing up without gloves for the majority of my teen and adult life. My hands look 10 years older than my age and my face looks 10 years younger...on a really good day...with low lighting...and loads of concealer.

Here's an unashamedly dry and sharpened picture.

Nice and easy for those of you who are short of time.  Take care friends.

xx

Friday 1 July 2011

Sinful...Dream On

Hey friends.

Hope you've all been well. 

I've had a lot of things going on separate projects going on for me over the past few weeks (looking for nail technician courses, business ideas, trying to get the right hair colour...I'm now a red-head) so whilst I haven't been posting, I have been doing 'nail stuff'.

My nails are getting longer and are actually longer on my right than they are on my left hand. But because I've been neglecting them a little, they are dehydrated and have started to curve inwards at the corners.  To help alleviate that problem, I've rounded them slightly.  And now I don't like them.  Never satisfied, me.

Here's what I did last night and have intentions of wearing into next week.


Here is the polish in order of use:
L-R: Sinful Colors 'Dream On', Gabrini '365', MUA Shade 2 and GOSH 'Holographic'.


A close-up of Gabrini's beautiful holographic glitter:

The plate I used from the most recent Bundle Monster set:
I hope you like it.  I'm off to have a look at my dashboard because I know I've missed out on some good blog posts recently. 

xx