Showing posts with label bundle monster. Show all posts

Sunday, 18 December 2011

Tutorial: Nail art stamping - lots of pictures!

Hey everyone, I hope you are well.

I've listened to what you've said and have made a pictorial to let you know how I create manicures with nail art stamping.  I'm sure other people have their own special techniques, but for those who are interested, here is how I do it.

I must apologise for the photographs; some were taken in natural light and others under the orange light of my kitchen. They aren't optimal conditions, but I did the best that I could....

First, start with your favourite base colour OVER A BASECOAT. Don't scrimp on the basecoat if you don't want stained nails. This is 'Purple Diamond'.

Sponge on your second colour. Put some polish on your sponge and dab it off onto a paper towel, then dab your nails, starting on the very tip first and then working towards the middle of the nail.

Sally Hansen's 'Red Carpet'.

Add a layer of glitter! This is 'Pinky Glitter' and these three gorgeous polishes were given to me by Marisa at Polish Obsession in a swap we arranged recently.
Use a layer or two of top coat over the glitter to smooth out the surface after the glitter. Doing this helps your stamping pattern to look like it's 'floating' on your nail. That's the preparation done.

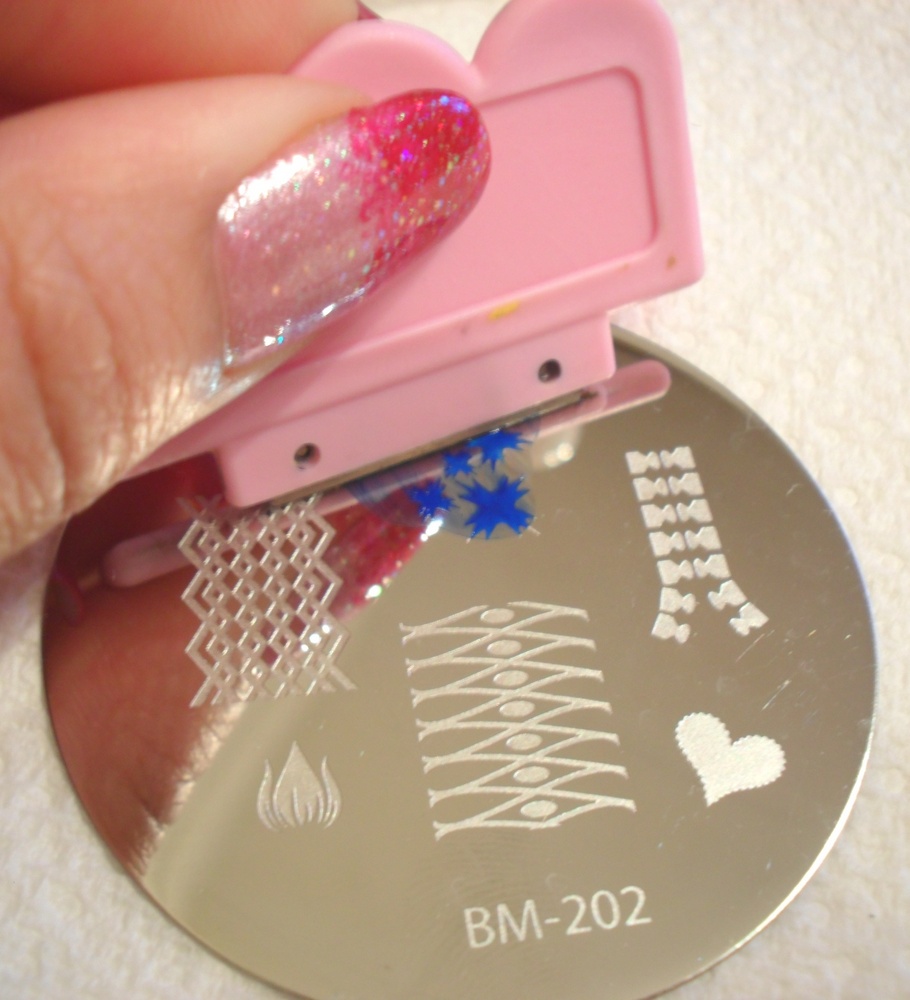
Materials to use are a stamping polish or a highly pigmented regular nail polish, stamper, scraping knife and image template. You can get a starter kit from various places. I got my first a year ago here. Bundle Monster does fantastic plates for a fraction of the price Konad charges.

 Cover your chosen image with polish.

 Scrape away the excess polish.

Immediately roll the stamp onto the image...

 When you remove the stamp, the image should be transferred onto the rubber.

 Blue didn't go with the polish I was wearing so I tried again with a white 'special' polish from Konad. This polish IS good, but sometimes you can get a normal polish that is cheaper but just as effective. MUA does brilliant black polish which only costs £1.

Position the image and slowly roll it onto the nail with a little pressure. Roll it all the way over to ensure that the image is transferred. It should transfer nicely but if it doesn't, lightly swipe the image off your nail with a cotton bud dipped in nail polish remover. If you covered your main polish with a top coat, you shouldn't have any issues with smudging.

Cover your nail with a clear top coat. Put a big drop of polish on your nail and try not to let the brush touch the nail when doing so. Don't worry if you flood your cuticles with polish at this point - you can remove it later.

 Finished product!

I tried my very best to make this as concise as possible... 

This is what works for me - what do YOU do?

Thanks for reading folks, I'm off to bed :)

xx


Sunday, 13 November 2011

31 Day Manicure Challenge Day 13 - 'Animal print'


Hi all!

Today was animal print day.

I'm deliberately not looking what other lacqueristas have done before me because I'm really trying to remain original. It's hard though, especially when it's the end of the day and I'm sitting here staring at bare nails with not a single idea coming to mind.

Okay, enough of the crying! Here is my animal print...be easy on me because I was tired.
Color (do you know how hard it was for me not to type COLOUR?!) Club 'De-Luxe-Cious

Bundle Monster plate BM-221

Hmm. Lazy stamping here.

Tomorrow the theme is flowers. Gahhhhhhh!!!!!


Thursday, 10 November 2011

31 Day Manicure Challenge Day 10 - 'Gradient'

Hey everyone, hope you are well.

Today's manicure is one of my favourites of late and I'm loathe to remove it, if I'm honest with you. I enjoy doing gradients and sponging - mostly because it's pretty easy to do.

Essence's Purple Diamond, sponged with Rimmel's Pompous and stamped with Stargazer Silver. Pinks and purples are my most favourite colours to use for a gradient.

The rhinestones were a part of a sample pack that was available for review, provided by Viva la nails.
I don't know about you, but whenever I use rhinestones, I find myself debating whether or not to use a top coat or just glue them on and go. Sometimes a top coat will dull the shine of the stones but failure to use one can also result in them falling off into your cornflakes at breakfast time. Not good for the teeth or the digestion.  Luckily, after using a top coat with these, I'm happy to say that they are still pretty shiny. Good stuff.

 I have so many to play with and if you look closely, you can see that the stones come in three, if not four sizes.

The plate used.

I'm going to enjoy wearing this for the day, but I'll have separation anxiety after removing it :(

Until tomorrow...

xx


Tuesday, 26 April 2011

More sponging and stamping.

Hi Friends, I hope everyone is well.

The weather has been so nice here recently.  That's one reason why my photos look different. I'm trying to make the most of the natural sunshine and my light box is in tatters (still) because I haven't had time to mend it!

I have a nice one for you today. Okay, I think it's nice anyway.  I was having a look at this blog the other day and it got me thinking; why haven't I tried to layer my stamping? Something I'd done before, but not intentionally. It's so simple and it makes perfect sense, so I thought I'd step up my stamping game.

Here ya go.

 This is NYC's 'Times Square', two coats.


L-R: Wet n Wild 'Tipsy (one layer), Sally Hansen Nail Prisms 'Golden Cinnebar' (sponged on first up to mid-nail), Essence Metallics 'Copper Rulez!' (sponged on tips)

BM14 (stars) and BM19 (circles) stamped with Models Own Goldigger

I loved this until I tore my middle finger and had to patch it. I hate patches but I'm trying to grow my nails out.  I'm so fed up of short nails that I've even been toying with the idea of acrylics again :-0!! I don't think I will though.

xx

Saturday, 29 January 2011

I love lilac

Hi friends, how's your weekend going so far?

Just to remind you, there are only a few more days left for you to vote for your good friend, moi, in this competition! 

Today I am wearing Barry M's Berry I/C (I'm thinking that this stands for 'Ice Cream' but they couldn't fit it on the sticker at the bottom of the bottle, lol!).  This manicure took forever; not that it was complicated, but because the stamping patterns I chose were wonky after I'd applied them, or I smudged something etc. I wasted a lot of nail polish remover last night :-(.  Finally happy with the end result, here I am!


The white lines were painted on free-hand, Rimmel's 'Pompous' and BM plate 11 was used for the stamping and China Glaze's 'Flying Dragon' was used for the dots...which were put on with a cocktail stick.

Tuesday, 11 January 2011

Queenie revamped...

Hello friends.

I don't have much to show you today and as I'm feeling a little out of sorts at the moment, this post will be pretty short.  I decided to doctor my No.7 'Queenie' manicure last night because I got bored with seeing a plain manicure.

For this I sponged on Eyeko's Vampira Polish, used some silver polish to stamp the images from Bundle Monster plate no.2 and topped it off with a little holographic glitter polish.


 I'd been waiting for an opportunity to use the lips images.


Until next time, kiss kiss...geddit?
:-)

Saturday, 25 December 2010

TWO designs for Christmas Day! Sponging V's Stamping...


Merry Christmas everyone! Let's hope that it's great for you all.
Over the past two days I've been in a quandary.  No, not about the last minute pressies that needed buying.  It was about my Christmas manicure (I know, I'm so sad). I said no to green, red and gold because I see that every time I look at my Christmas tree and it's starting to jar me a little.  So I went for something non-christmassy.

This was the first thing I came up with...but didn't stick with it!

Sponging with some bows.

 
L-R Beauty UK Glam Nails White, Barry M Berry I/C, Models Own Magenta Pearl, Models Own 3-in-1, sponge from an old sponge hair roller.


Nfu-Oh 50, Star Gazer 112 and three Rio Nail Art Stripers (but I used the brushes and not the actual Rio polish - because it smudges)

 1. Start by painting white over your base coat - I used two coats.

 2. Ignore the middle finger for a sec, I forgot to take pics before I did step three. Dab some polish on your piece of sponge and start dabbing onto your nail, starting at the tip and moving towards the cuticle. Try to use less dabs the further up you go and maintain colour intensity on the tips.


 3. Repeat sponging with the second colour, starting at the tip of the nail. Try not to go too far over the first colour because you want to create a gradient.

 4. Use a striping brush to paint on a bow. Try to outline it with the black polish and add some shading with the darker of the sponged colours...I tried, but I'm no artist :-S

 5. Nearly finished.


6. Put a layer of Nfu-Oh on and Bob's Your Uncle!! I didn't leave it like this though. I went for the next pattern and stuck with it.


THIS is my Christmas manicure...
 Models Own Magenta Pearl

 L-R Konad Special Polish, Beauty UK White, Rimmel Pompous, Models Own Magenta Pearl, Rio Nail Art Purple (only used the brush though, not the colour).

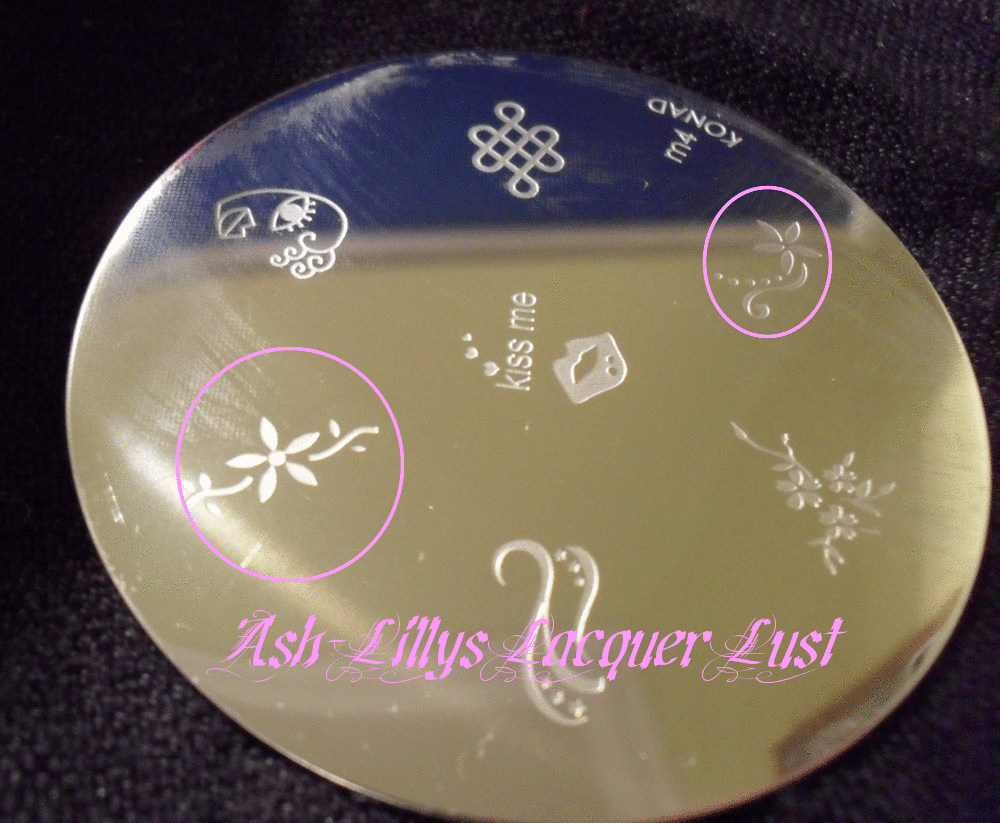
 Konad Stamping Plate M4

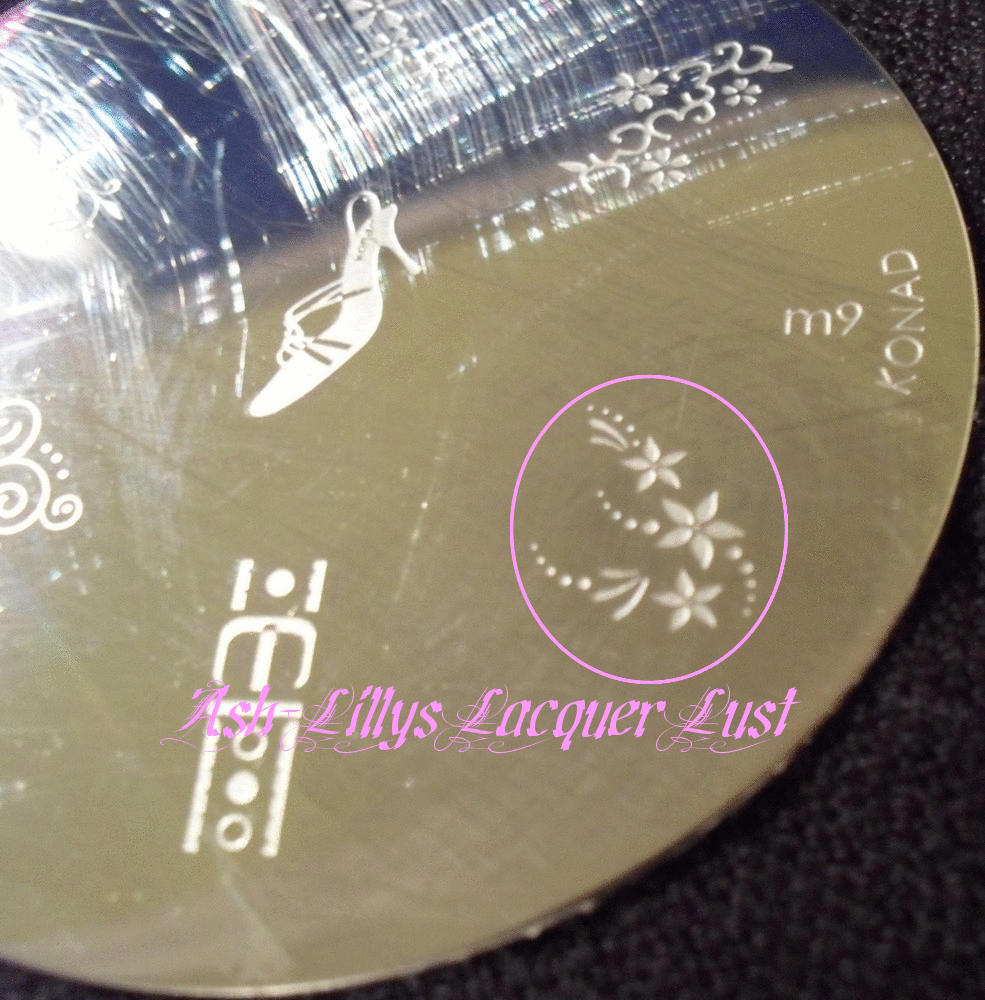
 ...and M9

 1. Paint on two coats of white diagonally (or all over if you choose). The bare bit of the nail will be covered with another polish.

 2. Put scotch tape (or any other tape you want) diagonally across the nail bed and tip. Leave the cuticle area free of tape and paint that with the red colour. Let it dry well and peel off the tape SLOWLY.

 3. Use the striping brush to paint the purple in between the red and white, to cover any imperfections.

 4. Use the Konad stamping kit to stamp on the images you want; dark colours in the white section, white colours in the dark section.

5. Use your favourite top coat and proceed to stare at your nails whenever they catch your eye!

I hope you found this post helpful and easy on the eye :-) Have a wonderful Christmas and I'll be back in a day or two.