Showing posts with label Sally Hansen. Show all posts

Sunday, 23 September 2012

Hello!

Well, hello!!

It's been about a month since I've blogged or even attempted to have a look at my dashboard. After having so many things going on, blogging became a second thought and I didn't want to just churn out manicures for the sake of it. Hence my sabbatical.

I thought that for the next few posts I would just show you what I've been doing.

 I absolutely love this pink. It's a jelly polish so you will need a few coats of it, but this is a colour that will definitely cheer you up. I wore this manicure to The Nails Show...but it didn't last more than one day because I used the wrong UV top coat and the whole thing started to crack!


I worked at The Cherished Hair Party the following weekend and wore the below designs:

Here's a set of nails I did at the party:


And here are a few pictures of some other manicures that I've done recently:


This particular design was one I found on Instagram and replicated.

I do have a backlog of pictures, so please bare with me.

Thanks for continuing to subscribe and follow during my absence.

xx


Wednesday, 4 April 2012

Gems and glitter.

Hi everyone, happy Hump day (the hump being the middle of the week, just in case you didn't know. I'm not being condescending...I'd never heard that phrase before until last year. I kid you not!)

I was hankering after a bit of embellishment last week and came up with this. I even rocked this for a couple of days at work - hence the tip wear.

Sally Hansen's 'Red Carpet' in it's glittery goodness.

 I used Swarovski crystals here, so even after putting on a layer of Seche Vite, the shine wasn't dulled.  I have found, in the past, that some of the cheaper rhinestones can be dulled by clear polish. I put some holographic glitter polish on the area joining the black and red and then stuck the stones into it whilst the polish was still tacky.

My right hand thumbnail was slightly different.

All in all, I actually enjoyed wearing this, but did experience some evil staining underneath the stones :( I know it's probably more fitting for a night out than a week in the office, but since when has that ever stopped me?

I'm not the only one who likes a bit of 'grrr' on their nails am I?

Sunday, 25 March 2012

Growth and glitter SPAM

Well, would you look at that. A whole week without posting...

In an attempt to clear the backlog of pictures that I have stockpiled over the last few weeks, I'm just going to spam you tonight.

Here's an update of my nail growth:

 Yes, I went back to using this serum again (click here to see my review of this product). After originally complaining that I didn't get talons within a two week period, I did continue to use this serum...and I found that I'd been a little hasty in my critique. Okay, so it didn't do much to make my cuticles feel moisturised, but I did notice faster growth. I don't how it works, but I do believe that it actually does.  I've had a few occasions  recently when I've looked at my hands and been pleasantly surprised.


 Notice anything strange? I have three nail extensions on. I cut my thumb nail right down to practice my tip application and acrylic overlay technique. I did this with my left hand (obviously) and I don't think I did too badly.  The pinkie fingernail has an acrylic extension and the ring finger has a gel extension on it - both of those were applied by a classmate of mine. 

And now, a little glitter spam...

 Studio M's 'Purple Medallion'. I know it's a little random, but I LOVE this polish!

 Can you see the change in nail length?


Okay, that's all for now. Have a happy start to your week and I'll be back soon.

xx

Saturday, 25 February 2012

My bare nails

After filing my nails to nothing for the sake of my manicure and pedicure course a few weeks back, I'm pleased to see that they've grown out a little.


I cracked the ring fingernail somehow. It's still attached and doesn't bend...I don't know what is going on there!

This is the cuticle oil I've been using recently. It's almond oil and I absolutely love the smell of it. I use it any time I remember. Don't be fooled by the name 'Maximum Growth'; I do not believe that this grows your nails per see, but it complements healthy nail practises such as moisturising.

I start the nail technology course this weekend, so goodness only knows what my nails will be looking like in the next few weeks!


xx
 

Wednesday, 21 December 2011

Glitter and cake pops!

Hi everyone.

Today I got a wonderful surprise in the post and also an award to share with you. First, the nails!

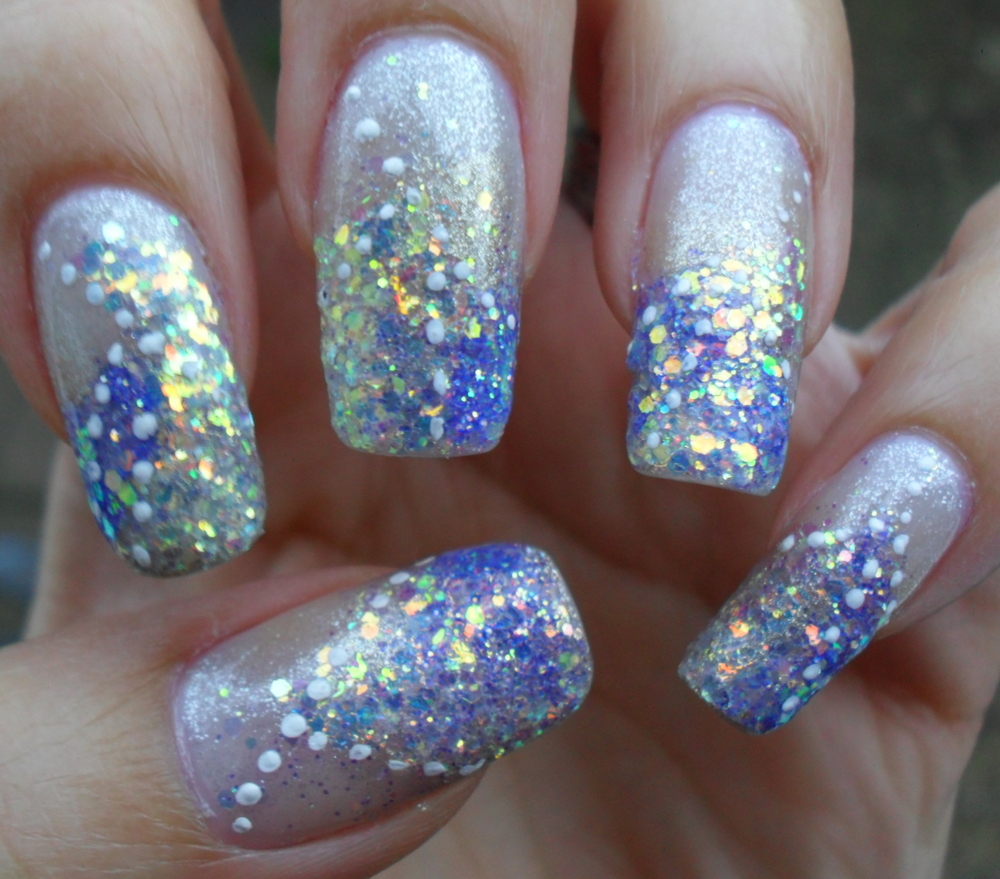
Over two layers of Sally Hansen, I dabbed some holographic opal glitter particles that I got from Viva La Nails. I added a few dots of white acrylic paint too, but you can't really see them in the pictures. 

Quite fitting really, because I was recently awarded this badge - courtesy of YoannitaL from On My Nail

Never a truer word said.

To go with the award, here are the "rules":
- Acknowledge receipt of this award
- Post a swatch of your favorite glitter polish (to prove you're deserving, of course :) - Well, it's not a glitter POLISH but I'm going to use it anyway!
- Pass this on to 4 more Glitterati - I know EVERYONE likes a bit of glitter, so please take this award if you want it.

 Today, I also got another surprise, but this one was delivered by the Royal Mail.

Cake pops made by Bailey Ana...although her pictures are far better than mine,see!

She even did a pictorial because she knew I wanted to try making them! To sat I'm chuffed is an understatement. Visit Dewbien at her Bailey Ana site for some baked inspiration...I'm off to go and eat them now!

xx

Sunday, 18 December 2011

Tutorial: Nail art stamping - lots of pictures!

Hey everyone, I hope you are well.

I've listened to what you've said and have made a pictorial to let you know how I create manicures with nail art stamping.  I'm sure other people have their own special techniques, but for those who are interested, here is how I do it.

I must apologise for the photographs; some were taken in natural light and others under the orange light of my kitchen. They aren't optimal conditions, but I did the best that I could....

First, start with your favourite base colour OVER A BASECOAT. Don't scrimp on the basecoat if you don't want stained nails. This is 'Purple Diamond'.

Sponge on your second colour. Put some polish on your sponge and dab it off onto a paper towel, then dab your nails, starting on the very tip first and then working towards the middle of the nail.

Sally Hansen's 'Red Carpet'.

Add a layer of glitter! This is 'Pinky Glitter' and these three gorgeous polishes were given to me by Marisa at Polish Obsession in a swap we arranged recently.
Use a layer or two of top coat over the glitter to smooth out the surface after the glitter. Doing this helps your stamping pattern to look like it's 'floating' on your nail. That's the preparation done.

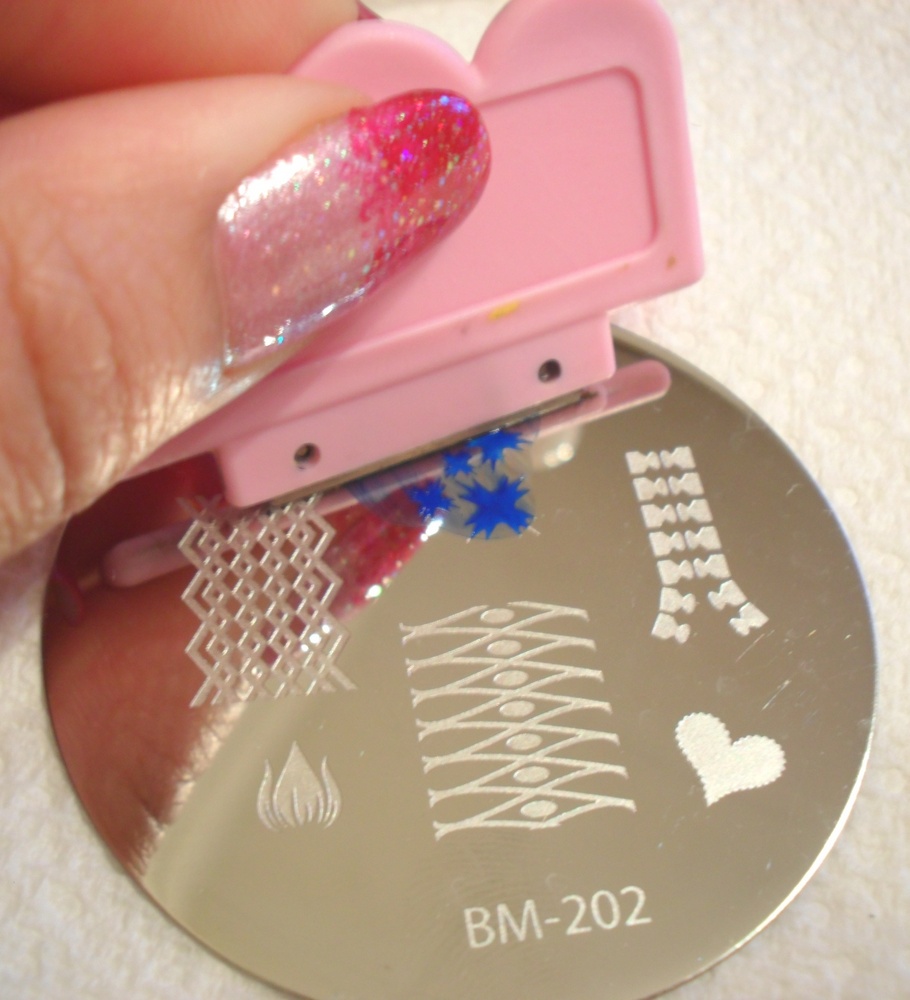
Materials to use are a stamping polish or a highly pigmented regular nail polish, stamper, scraping knife and image template. You can get a starter kit from various places. I got my first a year ago here. Bundle Monster does fantastic plates for a fraction of the price Konad charges.

 Cover your chosen image with polish.

 Scrape away the excess polish.

Immediately roll the stamp onto the image...

 When you remove the stamp, the image should be transferred onto the rubber.

 Blue didn't go with the polish I was wearing so I tried again with a white 'special' polish from Konad. This polish IS good, but sometimes you can get a normal polish that is cheaper but just as effective. MUA does brilliant black polish which only costs £1.

Position the image and slowly roll it onto the nail with a little pressure. Roll it all the way over to ensure that the image is transferred. It should transfer nicely but if it doesn't, lightly swipe the image off your nail with a cotton bud dipped in nail polish remover. If you covered your main polish with a top coat, you shouldn't have any issues with smudging.

Cover your nail with a clear top coat. Put a big drop of polish on your nail and try not to let the brush touch the nail when doing so. Don't worry if you flood your cuticles with polish at this point - you can remove it later.

 Finished product!

I tried my very best to make this as concise as possible... 

This is what works for me - what do YOU do?

Thanks for reading folks, I'm off to bed :)

xx


Monday, 14 November 2011

31 Day Manicure Challenge Day 14 - 'Flowers'...and tears!

Good evening readers.

Today I am posting up a picture of my 'Flower' or floral nails. Whilst I love the end result, I was far from dissatisfied with what I saw when I removed the polish (you'll see what I mean in a minute).

First, here is the eye candy:
This is Sinful Colors 'Innocent'. Hmmm.


 To do this, I used the 'Innocent' as a base and sponged on Barry M's Matte White. After two layers of Sally Hansen's Diamonds, I used image plate S5 to stamp on the cherry blossoms. I then went in with my tiniest art brush and painted in the petals and centre with acrylic paint, before adding a few black dots for effect. My back was aching after that!


Just look at the absolute horrors I saw when I removed it...

'Innocent' is not so innocent after all. The staining is horrific. I was bawling about it all over Twitter today and after soaking my nails in lemon juice and using two stain removal tablets (effervescent ones) I still had no joy. I think I'm going to have to take some drastic methods here...baking soda here I come. By the way, thanks for the tweets of advice my dears :)

Aside from the 'stainage' I hope you liked it!

xx

Wednesday, 9 November 2011

31 Day Manicure Challenge Day 9 - 'Rainbow'

Hi all (and a big hi and welcome to my newest readers)

Today is rainbow day!


These 'rainbow nails' were one of my favourite manicures to do. I used a base coat and then my trusty acrylic paints. Thinking about it now, the pinkie is missing a stripe of pink...ah well.

Sally Hansen's 'Diamonds' was layered over the acrylic paint twice. I bought this from Superdrug for 45p - I kid you not!


I decided to stamp over the manicure and used the M60 image plate that I bought from Bornprettystore
Admittedly, I'd been looking at this plate on-line for a while and when I saw it in the sale, I snapped it up.  I'm happy to say that the images were clean and crisp; sometimes you get plates that have defects in them; they have spots or nicks that end up with polish in them and get transferred to your nail, thus ruining your manicure. The only issue I had with this plate was that this image was just too narrow for my nails. I had to transfer the entire image and go back in and a re-stamp again. You can see how messy it looks on the index finger.


I'm a little disappointed because I actually really like the pattern on the top left. It's a shame that it didn't fit. Nevermind, I'll just have to be creative with my applications in future!


I'll be back tomorrow with gradient nails...

xx