Showing posts with label nail stickers. Show all posts

Friday, 28 June 2013

Just a bit of glitter and stickers

Today, I thought I'd show you a mani that I have been wearing for about a week. 

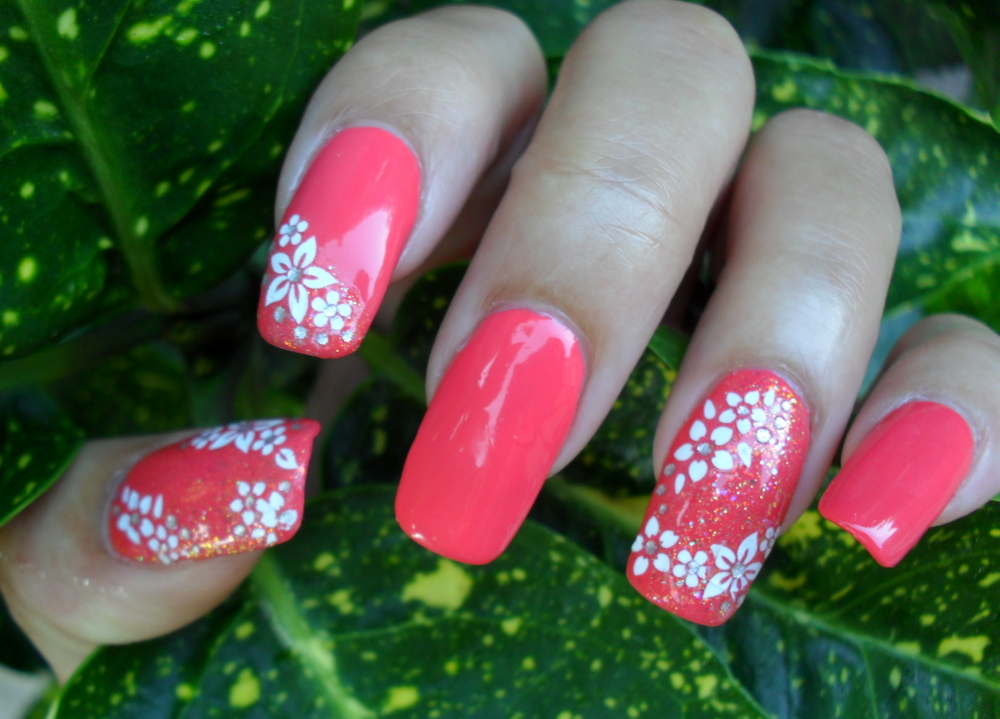
This is gel polish, and some Nailtopia nail stickers.

 The stickers are roses and the rest is acrylic paint.


  The lines are done with a very thin detailing brush and the dots? A dotting tool!


Here they are again in a 'negative space' manicure. The polish is gelish this time.

The stickers are thick and raised, so if using them with nail polish or gel polish, you will feel them if you run your finger over them. I suppose that this isn't a bad thing really - the stickers are quite sturdy as a result. I can't really fault them and I have been quietly adding these to my stash since last year...shhhh. It's not just polish that I hoard (muhahahahaaaa!)

xx

Wednesday, 19 June 2013

Elegant Touch Envy Wraps

Hey everyone!

Today I have some *Elegant Touch nail wraps to show you.

 I thought I'd try out the 'Black and Chevrons' pack.
Each pack comes with a sheet of nail wraps, an emery board and instructions. The 'accents' are extra stickers that you can put onto your nail wraps to jazz them up.

Initially, I was a little dismayed to see that the wraps were so short. My nails were quite long and I didn't want to cut them, so I thought I'd try to do something with the wraps anyway.


 I'm happy to say that the wraps were of a really good quality. They were very stretchy and I was able to manipulate them to fit the length of my nails, without compromising the strength of the wrap (well done Elegant Touch!). The wraps were very easy to use - they were self-adhesive, so all I had to do was remove them from the plastic sheet and stick them on nails that were first treated with a base coat. Once the wrap was on, I could stretch it into place and file off the excess product.

 Then, I just stuck on the accents! You might notice that the middle finger looks a little strange...the wrap simply wouldn't stretch any further. You may also notice a little bit of fluff near my pinkie - please ignore it, it just wanted it's moment in the limelight.

I'm not sure about how long these wraps would actually last because I took them off after a day. The wrap on my middle fingernail was too short and I could see my nail peeking out from underneath. If you have shorter nails, these would be perfect for you. They are sturdy, they look good and the accents give you the opportunity to be creative without getting nail polish all over you. No need for a top coat either - the wraps are made with 'UV Gel technology' which makes them shiny and resilient.

The wraps should be available, nationwide (UK) at Boots and Superdrug stores.

xx.
*Products sent for my consideration

Wednesday, 29 May 2013

Birthday nails!

Hi everyone,

It was my birthday recently and I decided to do a little something with my special and extremely expensive Sha Pro nail stickers (O_0). The manicure is completely Gelish, by the way. I was doing some nails a few days afterwards so I needed something with a bit of longevity.

 Here's me posing with one of my little birthday gifts - a lip stain.


Sorry about the picture quality - my little old camera is on it's last legs and I had to use my iPhone!

Thanks for looking :)

xx

Friday, 17 May 2013

OPI Dulce De Leche and Nail Art Nail Tattoos.

Happy Friday everyone.

I've been slipping on my posts again...what can I say? Nothing, apart from 'I'm getting there!'

Today, I have a quick OPI swatch and I'll also be showing off some Nail Art Nail Tattoos.

 OPI's 'Dulce De Leche'.

 Nail Art Nail Tattoos from Skin Art UK They are thin and self-adhesive. All you need to do is peel them carefully off the backing paper, and stick them onto your nails. Cover with a top coat and you're good to go!


 I decided to add a few ribbons and tails to the bow on my nail. I was trying to be 'office appropriate' whilst wearing these.  The beauty of wearing art on only a couple of fingers is that you can strategically place your gilded talons when necessary! Imagine me at the water cooler, talking to a senior manager...with my middle and ring fingers hidden behind a clip board, hahaha!

xx

Wednesday, 13 February 2013

'French' Valentine's manicure, number 2

Here is Valentine's manicure number two:

 I rarely wear French manicures. Come to think of it, I'm not even sure if I've ever posted one on my blog. I wore them constantly when I had talons (natural) back in the 90's...cor, that makes me sound really old.

My nails are actually incredibly short at the moment. You wouldn't believe it, but my index finger nail is about 1mm long. I have high hyponychiums (that piece of skin on the underside of the nail where it's  actually attached to your finger), so my nails look longer than they are. The French manicure also gives the illusion of length, but I find it incredibly boring...hence why I HAD to jazz it up!

 For this look, I used these Gold Lace Stickers from Born Pretty Store.

The stickers come in long strips which have an adhesive on the back, so you can cut as much or as little as you want and stick it to the nail.  I used two layers of top coat to seal these on because I was worried about them lifting at the edge.  I needn't have worried - they were really hard to remove. I used pure acetone to remove the polish, but the stickers were stuck tight. Unfortunately I had to scrape at the stickers to get them off my nail in the end.

So there you have it. Some really easy Valentine's day looks. I couldn't go with some crazy pink design this year - I have several important meetings tomorrow and a bunch of hearts and glitter wouldn't really have been appropriate!


Whatever you do tomorrow, have a lovely day and thanks for reading!

xx

Saturday, 9 February 2013

Kiss my nail strips!


 If you've kept up with my blog over the last two years, you will know that I am a lover of water decals and nail stickers. Not only are they a way to instantly jazz up a plain manicure, they are also quick and easy to use when you are in a hurry. These nail polish strips by *OMGNailStrips are right up my alley.

In one packet, you'll get two sheets of pre-cut nail stickers. They are so simple to use: just size the strips up on your own nails, remove the clear plastic covering on top of the pattern, peel the design off the cardboard backing paper and stick them onto your nails. You can stretch them (which is good if you have a high apex, or curve, to your nails) and they won't tear.

 Finished product.

The OMGNailStrips after one day of wear. There is some tip wear, but I'm not known for wearing washing up gloves and I had washed three heads of hair with these on.

Weird hand pose...

Have you worn these strips before? What do you think?

xx
*Sent to me for consideration

Tuesday, 17 July 2012

Lace stickers

Hi friends.

Unfortunately (or quite possibly fortunately), my Gellux chipped and I had to remove it. It only chipped because the tutor applied it very thinly over a torn nail. Said nail then broke and that was enough for me to get the acetone out.  The Gellux took ages to remove :-/

I realise that I haven't been very creative of late so I decided to break out the nail stickers. I've seen similar tip manicures on Ying's site, so I thought I'd do my own.


 I need to stop being so lazy and actually use my camera, as opposed to the camera on my iPhone.

I don't have a huge amount to say about this manicure other than that I'm bored of it after only one day of wear! Oh, by the way, you see that middle fingernail? It's wonky but I can't file it anymore. If I do, I'll be filing my skin!

Take care!

xx

Tuesday, 5 June 2012

Foil me once, foil me twice

Hey everyone.

It's been the Queen's Jubilee weekend here in the UK and I've been pretty busy and also a bit under the weather (story of my life really).  I've now got a few manicures backed up, waiting to be posted, but rather than bombard you with them I will space them out.

A few weeks ago I tried my first ever foil manicure. It was a big fail. When I originally put it on, it had looked stunning. I then added a normal topcoat and the foil crinkled up like used Bacofoil. One of my Twitter buddies suggested that I actually use a special foil topcoat and this gave me the excuse to go to eBay and buy things!  I found Jennysellsfoils and ordered a topcoat by Kami from Jenny - the vendor. After I'd paid, I got a long automatic email back from her, giving instructions on how to use foils etc. I replied to the email thanking Jenny for her instructions and mentioned how frustrated I'd been...and she emailed me back again with even more tips. Talk about customer service! The topcoat also reached me the following day, along with a few sample foil strips, so I was pretty chuffed.

Here's the manicure:
'Tropical Sunrise' and the Kami Foil Topcoat.

 I put the foil on over a glitter base colour.


 'Tropical Sunrise'.

I do actually have a tutorial on how to use foils and I'll post it soon.

Have you used foils before? How did you find them?


Monday, 24 October 2011

Where do you get YOUR supplies - Viva la nails haul and review

Hey friends!

Where do you get your nail art supplies?

I usually go to my local beauty product chains or order on-line. I know that I may be preaching to the converted, but for those of you who are new to nail art/polish/care you may (or may not) find this post helpful. Hopefully, it's the former! I tend to buy a lot of my nail art supplies on-line but it tends to be from wholesalers who don't ask you to make a minimum spend.

Ebay is a very good source, as is Amazon. If you find a reputable seller you can buy at a good price with fast delivery and a great service. You can also get burned if you are not careful; try having a look at the scores and reviews of a vendor before purchasing (if you are new to either of those Internet market places). If you are into adorning your nails with shiny things that can be glued on, you could also take a trip to a craft store such as Hobbycraft - you may just find what you are looking for there.

There are a few popular on-line stores that are good.  I have found Catherine Arley polishes here and they are as cheap as chips.  Beauties Factory UK seem to have some good items and you can shop wholesale if you want to. I haven't ordered from them yet, but I've got my eye on a few items which I may treat myself to soon...Christmas IS coming and I've been a very good girl.

I have put in my first order with Bornprettystore and I'm waiting for my delivery. When I get my parcel, I'll let you know what bought. A lot of bloggers seem to use this site and again, they do have some nice items. If you like what you see, use this code: TENOFFK31 and get 10% off your order. As they are not based in Europe, you won't get next day delivery, but they offer free international shipping, so that makes up for the wait!

In the meantime, let me tell you about Vivalanails. I've used this site on several occasions to buy my nail art supplies, partly because the price is reasonable and also because they sell my beloved nail art magazines which are so hard to find in the UK. Don't let the web address fool you though, they are based in Latvia, not the UK! This means you won't get your shipping the next day or the day after that, but their prices are very reasonable and service is great. They also give you the opportunity to review some of their items for the price of postage alone. Now, as I love a good nail sticker, I couldn't pass up THAT opportunity!

First, let me show you what I purchased...
 Skeleton leaves (which you could find at a craft store in larger quantity...and at a higher price), water decals and flower stickers.These stickers were in the bargain section for about 45p! I love these rhinestones too-the first I've seen like this. I also bought a blade with a safety covering to cut my fimo canes and another glossy Japanese nail art magazine - these aren't pictured.

Below are the water decals and stickers that I got for review purposes:
 The ones on the black card are sticker and the others are decals. I didn't get to take a picture of the ones I used *slaps forehead*.

These butterfly decals are too cute. If you don't already know what to do with these water transfers I'll tell you. The images come attached to a piece of backing card. There is also a thin piece of plastic top sheet which is there to protect the images.  You will need to soak the images off the backing card, in order to apply them to your fingernails. 

After removing the plastic top sheet cut out the card with your desired image on it. Place the card into a bowl of water for a several seconds. When you remove the card from the water, you should find that you can easily slide the image off. Don't do this all at once though, the image may end up sticking to itself. Instead, slide only half the image off the card. You can apply that part of the image onto your nail and slide away the rest of the card after the image is in the desired position. Add a top coat and you're good to go.

I love water decals - especially these ones.  They are flat, easy to use and leave you with a smooth finish. These ones are quite sturdy too and don't take a lot of soaking to get the image off either. I put one to soak, went off to get a cuppa and when I got back, the card had sunk to the bottom of the bowl and the butterfly was floating on the surface of the water. As a result, it stuck together when I tried to fish it out with an orange stick...but putting it back into the water made it un-stick again! Good stuff.

In the review pack were some self-adhesive stickers:


Removal was hardcore too. I rubbed and rubbed with my trusty non-acetone polish remover but the only thing that came off was the polish surrounding the stickers. I had to scrape the stickers off with my thumbnail and then remove the residual polish. This probably wouldn't have been an issue had I used some acetone, but I don't generally like to use it unless I am using acrylic/glue/layered glitter.

Overall, I liked both products, but the water decals were by far my favourites.

Do you know of any good retail sites that are either based in Europe or ship internationally? Perhaps you could supply me with some nails and I can try to make a directory page...what do you think?

xx


Friday, 30 September 2011

Bulter and Wilson, Nails Inc and my current mani

Okay, so after the Collection 2000 launch, myself and Larry went off in search of a swift half, before bedtime.  As we wandered around, we came across some shop fronts that totally blew our minds. 

Check THESE out!


 We found these beauties at Butler and Wilson. These iPhone covers are not as expensive as you might think... Maybe if you're really good this year Santa might sort you out?

Nails Inc have also launched a Magnetic Polish range.


Apologies  for the poor quality shots; I had my face pressed up against the shop front window to get a snap of these bad boys. 

The display video in the window shows the nail technician painting the nails of a customer, taking the lid of the bottle (which has a magnet in it) and placing it near to the wet nail for a few seconds.  When the lid is removed, magnetic particles in the polish have been pulled into a pretty pattern. For those of you who haven't seen this before, it is definitely a sight to behold. Usually I don't rate Nails Inc polishes because I don't think the £10.50 - £11.00 price tag is always worth it. These bottles are £13 each! I don't know... would YOU buy these?

And now onto MY nails! This what I wore in the last post:

 Collection 2000's Fruit Salad with Nubar 2010 on the thumb, index and ring fingers. The stickers were a bit of a nightmare to get off the plastic backing sheet but I managed not to tear too many of them.


Hah. I tried to do an artsy shot like Anastacia but it wasn't quite the look I was going for. We don't have much in the way of plant life in our back garden!


Until next time!


xx

Saturday, 27 August 2011

Well, Hello Kitteh!

Hi friends, I hope this blog post reaches you in good health...

My last post featuring the water decals was quite some time ago - but this is mainly because they lasted so long. Well over a week, in fact. I enjoyed wearing them so much, I didn't have the heart to remove them.

Unfortunately, my nails have reached the length where they usually start to break on me. 8/10 of my nails is sporting a patch at the moment. Only my ring fingers are damage free :(

Here is something I did last night with a polish I picked up from H&M (or Hennes, as I frequently call it...yeah, I'm old skool).

I painted the tips pink first and then made the stripes with this polish. When I was done, I added the rhinestones and then the lace sticker tape for a final touch.

I like 3D nail art, especially Japanese nail art trends. Anything sculpted, embedded or contrary to the normal manicure is the thing for me. I can't say that I'd wear all of it because I've seen some really abstract designs, but I'm interested in the creation of nail art.  So much so that I've decided to further my knowledge about the nail industry and take a course.


So, what areYOUR favourite nail trends? What manicures are easy on your eye? Which ones make your skin crawl? Which nail shape do you prefer? I'm so NOT a fan of mid-to longer length nails that are rounded to a point and look like lions claws...are you?