Wednesday, 21 December 2011

Glitter and cake pops!

Hi everyone.

Today I got a wonderful surprise in the post and also an award to share with you. First, the nails!

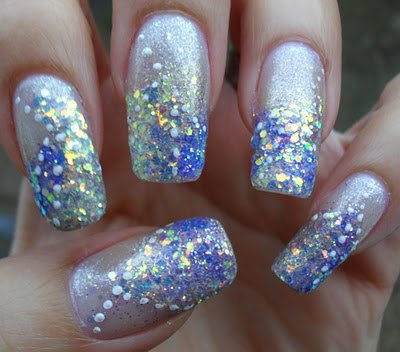
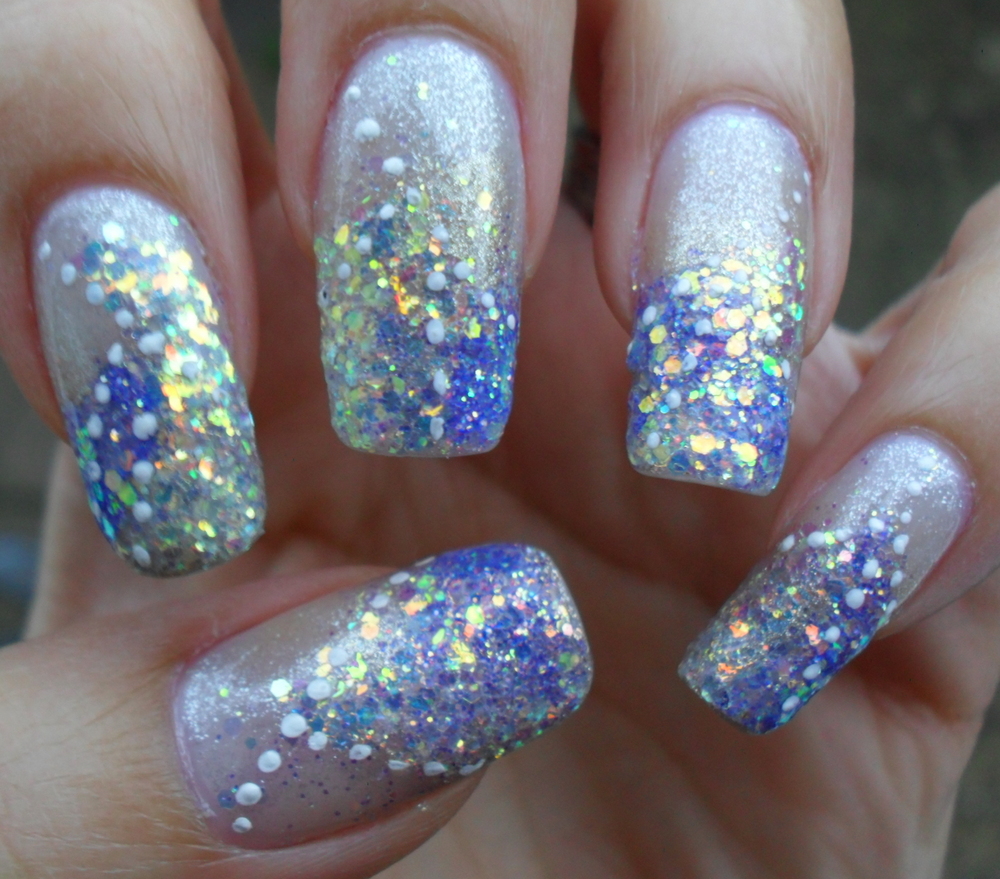
Over two layers of Sally Hansen, I dabbed some holographic opal glitter particles that I got from Viva La Nails. I added a few dots of white acrylic paint too, but you can't really see them in the pictures. 

Quite fitting really, because I was recently awarded this badge - courtesy of YoannitaL from On My Nail

Never a truer word said.

To go with the award, here are the "rules":
- Acknowledge receipt of this award
- Post a swatch of your favorite glitter polish (to prove you're deserving, of course :) - Well, it's not a glitter POLISH but I'm going to use it anyway!
- Pass this on to 4 more Glitterati - I know EVERYONE likes a bit of glitter, so please take this award if you want it.

 Today, I also got another surprise, but this one was delivered by the Royal Mail.
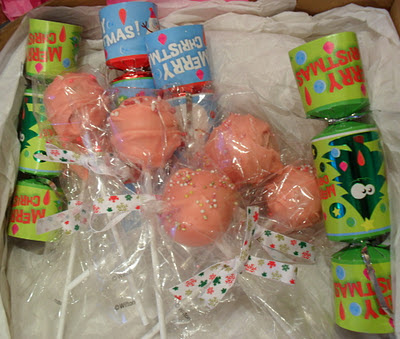
Cake pops made by Bailey Ana...although her pictures are far better than mine,see!

She even did a pictorial because she knew I wanted to try making them! To sat I'm chuffed is an understatement. Visit Dewbien at her Bailey Ana site for some baked inspiration...I'm off to go and eat them now!

xx

Sunday, 18 December 2011

Tutorial: Nail art stamping - lots of pictures!

Hey everyone, I hope you are well.

I've listened to what you've said and have made a pictorial to let you know how I create manicures with nail art stamping.  I'm sure other people have their own special techniques, but for those who are interested, here is how I do it.

I must apologise for the photographs; some were taken in natural light and others under the orange light of my kitchen. They aren't optimal conditions, but I did the best that I could....

First, start with your favourite base colour OVER A BASECOAT. Don't scrimp on the basecoat if you don't want stained nails. This is 'Purple Diamond'.

Sponge on your second colour. Put some polish on your sponge and dab it off onto a paper towel, then dab your nails, starting on the very tip first and then working towards the middle of the nail.

Sally Hansen's 'Red Carpet'.

Add a layer of glitter! This is 'Pinky Glitter' and these three gorgeous polishes were given to me by Marisa at Polish Obsession in a swap we arranged recently.
Use a layer or two of top coat over the glitter to smooth out the surface after the glitter. Doing this helps your stamping pattern to look like it's 'floating' on your nail. That's the preparation done.

Materials to use are a stamping polish or a highly pigmented regular nail polish, stamper, scraping knife and image template. You can get a starter kit from various places. I got my first a year ago here. Bundle Monster does fantastic plates for a fraction of the price Konad charges.

 Cover your chosen image with polish.

 Scrape away the excess polish.

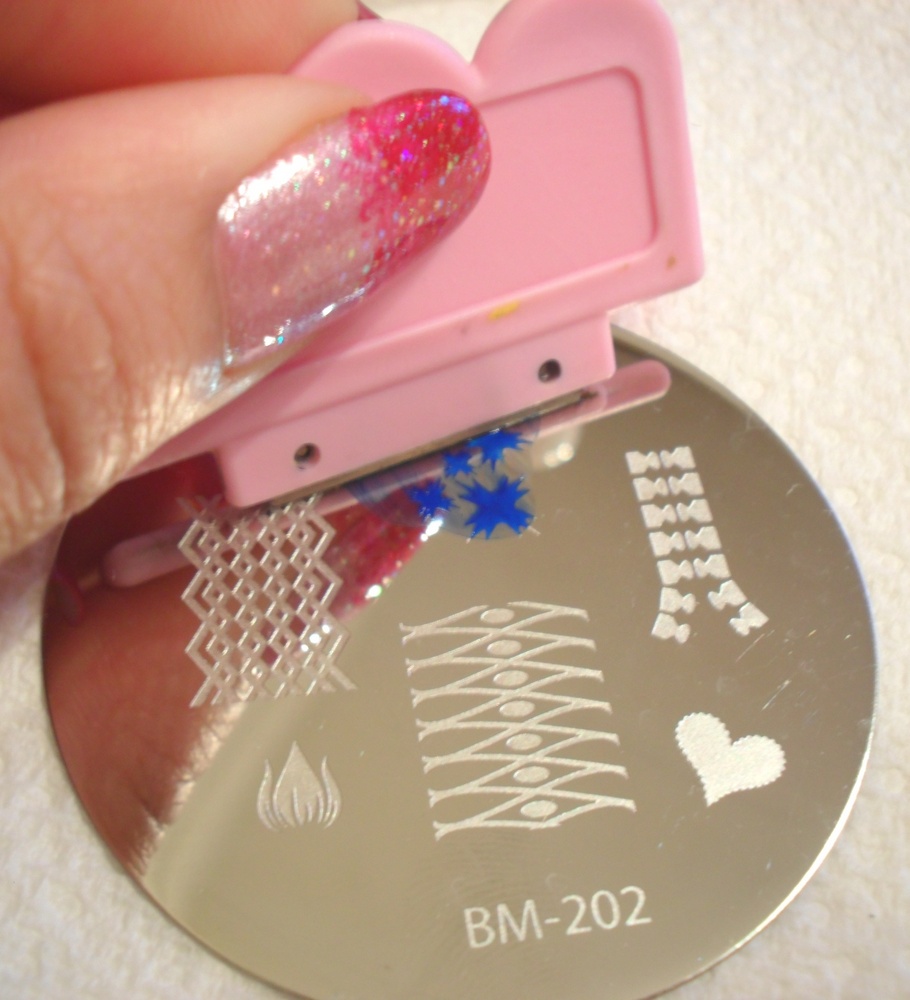
Immediately roll the stamp onto the image...

 When you remove the stamp, the image should be transferred onto the rubber.

 Blue didn't go with the polish I was wearing so I tried again with a white 'special' polish from Konad. This polish IS good, but sometimes you can get a normal polish that is cheaper but just as effective. MUA does brilliant black polish which only costs £1.

Position the image and slowly roll it onto the nail with a little pressure. Roll it all the way over to ensure that the image is transferred. It should transfer nicely but if it doesn't, lightly swipe the image off your nail with a cotton bud dipped in nail polish remover. If you covered your main polish with a top coat, you shouldn't have any issues with smudging.

Cover your nail with a clear top coat. Put a big drop of polish on your nail and try not to let the brush touch the nail when doing so. Don't worry if you flood your cuticles with polish at this point - you can remove it later.

 Finished product!

I tried my very best to make this as concise as possible... 

This is what works for me - what do YOU do?

Thanks for reading folks, I'm off to bed :)

xx


Sunday, 11 December 2011

Dearlee nail polish review

Evening all.  

Tonight I have a review for you.  Recently Born Pretty Store sent me this nail polish for review purposes.

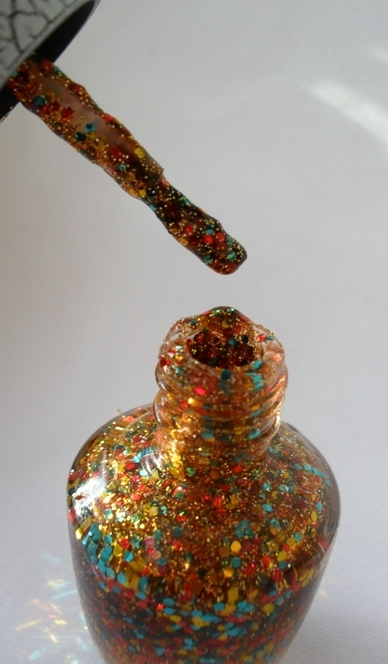
This is Dearlee nail polish in '080'. The base colour is a orange/brown jelly (okay, so that doesn't sound very nice), but it is jam packed with red, green/blue and gold hexagonal glitter and gold mini glitter particles. You may notice that the lid has a crackle pattern on it. IT IS NOT A CRACKLE POLISH. I don't know why the lid is like that.

At first I thought I'd be able to use this as a glitter top-coat for a Christmas manicure - the colours would be perfect right?
Unfortunately, this is the consistency I was working with. This formula could use a bit of polish thinner to make it easier to apply. Having just had a look at the website, I think I got a dodgy bottle, because the polish doesn't look this thick in the pictures.

This is one coat.

Two coats. Great coverage.


Overall, this polish is nice enough. It is quite thick and this can make application difficult. It dries rough due to there being so many glitter particles in it, but you can counteract that roughness with a few coats of a rich top-coat like Seche Vite.  I don't think it would be suitable for a delicate nail art design, but you could definitely stamp some bold designs on in dark colour. I was in a hurry so I didn't!

If this is a polish that interests you, you can find it here and can use code: JAYCEJ61 for a 10% discount.

Thursday, 8 December 2011

Sinful staining and Bubble White

Hey all.

This post is to reveal how absolutely terrible my nails were looking a few weeks ago after day 14 of the 31 day manicure challenge .  They are currently stained beyond recognition because of the very evil 'Innocent' by Sinful Colors.


Please look at the horrors that lurk beneath the lacquer:

GAAAAAAAAAAAAAAAAAAAAAAAAAAAAHHHHHHHHHHHHHHHHHHHHHHHHHHHHH!

Oh my goodness. The sheer horror. And this was after only a few hours of wear AND I wore a base coat.  My thumb and index finger were patched in places, hence the way they look.

Two of my lovely Tweeties (whom I can't link to now because Blogger is telling me that I don't follow any bloggers, yet I follow at least 100 if not more) Marina and MariJo, suggested ways to get rid of the traces of eviiiil.
One of these ways was this:

Bubble White, effervescent powder that bubbles and removes stains when added to warm water and used to soak stained nails. It cost £1.99 from Sally's and was enough for one use.  This stuff smells like menthol and claims to cleanse your nails of stains in 5 minutes; I soaked my nails for 15.

This is what they looked like before:

Grotty.
After:
I THINK I can see a subtle difference on my pinkie. They still look awful naked now though.

Since these pictures, I've buffed them very lightly (I never buff my nails!) and there has been a slight improvement. I still can't pull off a french manicure for now.

Have YOU found any fool proof ways of ridding yourself of stains? Any tips to give me or any other readers?

Thanks for visiting :)

xx

Tuesday, 6 December 2011

Nude glitter stamping... and what I'm listening to right now.

Hello friends, how are you tonight? 

I'm sat here listening to British recording artist called Daley and editing my pictures. Doesn't sound like much? Well, simple things please me. Like turning the television off and putting some music on the iPhone. Or listening to a CD. Yeah, a real CD. Or even finding an old cassette tape (hands up if you still have one of THOSE!)  Anyway, I'm going to pop the YouTube video of this guy at the bottom of my post so you can enjoy the evening with me.

Right, nail time!

 Here is The Face Shop's Number BR802 with Peripera's P040 (glitter) and leaves from plate BM208. I did this last night.

Don't you hate it when you do your best to stamp a nice, clear image...only for your cruddy top coat brush to drag and streak it?

I have a few tips for you when you are stamping (if you don't already do these things).
1. To minimise streaking, put a put a dollop of polish on the brush and float it down over your nail. DON'T LET THE BRUSH TOUCH YOUR NAIL.

2. To make it easy to remove a messy image without ruining your base polish, make sure you use a top coat on your base colour BEFORE stamping over it.

3. Have a cotton bud and cotton wipe readily soaked in acetone or polish remover to clean your stamper or remove part of an image you don't want, before putting it on the nail.  You can also use a small brush dipped in solution to do this.

These tips are in hindsight...had I thought about it before, the manicure would have been tidier.

You could also change this design by turning it into a french manicure. Start with clear base nail bed, and use the colour, glitter and stamping on the tips. For effect, you cour outline the 'smile line' with some...

...metal balls (if you want too see this old manicure, click here)

By the way, one of you lovely ladies made me think today. 
Do you want to see more tutorials (step-by-step pictures) when I do stamping, or are you happy for me to just tell you what I did? A lot of you ladies are pretty proficient in your stamping already, but what about you readers who don't have blogs or are new to nail art stamping?

Have a listen to Daley and let me know in the comments box.

xx

Monday, 5 December 2011

GIVEAWAY WINNERS...

WOWWW.

Can I just say how very, very happy I am right now? Thank you so much for your entries into my giveaway. A lot of you spent time blogging, putting pictures up and commenting and I really do appreciate it.  I have a lot new readers now and I'm hoping that you have been and will continue to enjoy my posts.

Do you want me to stop gassing and give you the results?

Okay then!

Prize number one:

Goes to...
Congratulations Alexa1202!


Prize number two:
Goes to...
Congratulations Miha.ela!

Both winners have been emailed today at the addresses that they have provided. They have 48 hours to reply to me. Failure to reply within this time will result in another winner being drawn.

For those of you who didn't win, please don't be too disappointed. This is not my first giveaway and it won't be my last.

Thank you ALL for taking part and for the sweet comments that I could not post due to email addresses being in them.

xx